
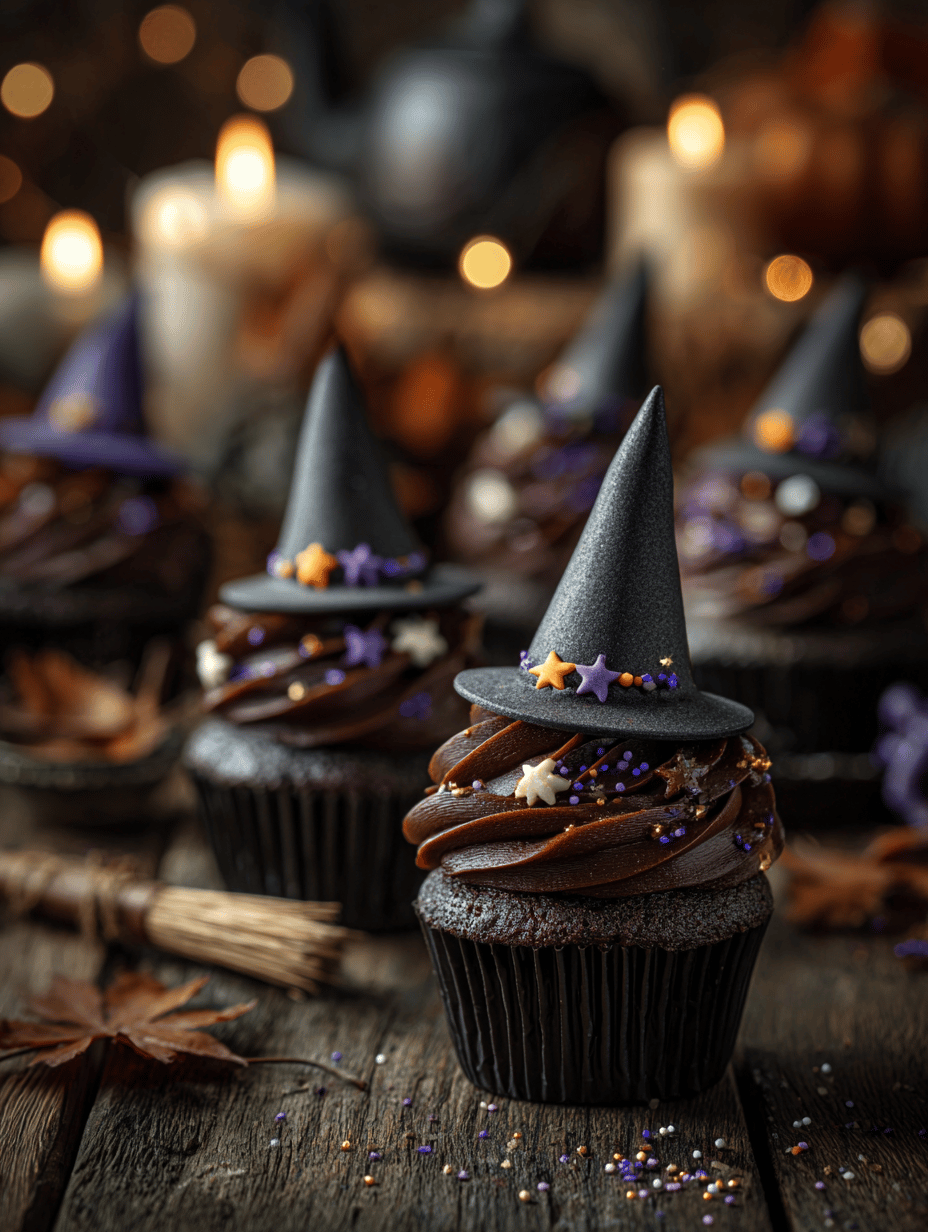
I’ve always loved how a simple cupcake can turn into a tiny piece of art, especially when it’s Halloween. These witch hat cupcakes are a fun way to add a dash of magic to any party or just a regular Tuesday. The best part? Making the hats look as spooky or silly as you want, no fancy skills needed. It’s all about the playful chaos in the kitchen.
Why I Keep Coming Back to This Recipe
It’s a reminder that simple ingredients can become magical with a little creativity. Each batch feels like a mini adventure, full of messy fun and sweet rewards. Plus, seeing everyone’s delighted reactions makes it worth every spooky second. These cupcakes turn the chaos of decorating into a moment of pure joy.
The Spells in Your Cupcakes
- Chocolate cake batter: Rich, moist, and dark—sets the stage for spooky sweetness.
- Chocolate frosting: Smooth, creamy, and slightly stiff—perfect for piping intricate designs.
- Cookies or wafers (cones): Crisp and sturdy—shape into the iconic witch hat points.
- Food coloring (black, purple, green): Add vibrant, creepy hues to your decorations.
- Candy eyes or edible glitter: Tiny details that make the hats come alive.
- Chocolate or icing for decorating: Use for piping bands and accents, adding texture and contrast.
Tools of the Magical Trade
- Mixing bowls: To combine ingredients smoothly without splatters.
- Electric mixer: Cream butter and sugar evenly, saving effort.
- Cupcake liners and muffin tin: Shape and contain the cupcakes during baking.
- Piping bag with star tip: Decorate with precise, textured frosting.
- Sharp knife or cookie cutter: Shape the hat cones from cookies or wafers.
Step-by-Step for Creepy, Cute Witch Hats
Step 1: Preheat your oven to 180°C (350°F).
Step 2: Line a muffin tin with paper liners.
Step 3: Make the cupcake batter: cream butter and sugar, add eggs, then mix in flour, baking powder, and milk.
Step 4: Fill cupcake liners about 2/3 full with batter.
Step 5: Bake for 20-22 minutes, until a skewer comes out clean.
Step 6: Let cupcakes cool completely before decorating.
Tips & Tricks to Perfect Your Witch Hat Cupcakes
- Ensure cupcakes are completely cool before decorating to prevent melting.
- Use a piping bag with a star tip for smooth, even frosting.
- Keep an eye on the oven; overbaking can dry out the cupcakes.
- If the frosting isn’t firm enough, chill it for 10 minutes before piping.
- Shape the hat cones with sturdy, slightly chilled cookies or chocolate wafers.
Witchy Kitchen Mistakes & How to Fix Them
- Decorating hot cupcakes causes frosting to slide off.? FORGOT to cool cupcakes before decorating? Chill them in the fridge for 10 minutes.
- Overly frosting cupcakes makes decorations droop.? DUMPED too much frosting? Use a spatula to smooth out the excess.
- Burnt cookie cones ruin the look.? OVER-TORCHED the cone? Submerge briefly in hot water to soften.
- Cracks in the cones make hats look patchy.? CRACKED the hat cone while shaping? Reheat gently or patch with melted chocolate.
Witch Hat Cupcakes
Ingredients
Equipment
Method
- Preheat your oven to 180°C (350°F) and line a muffin tin with paper liners.
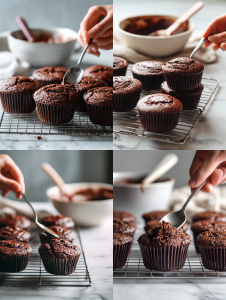
- Mix the chocolate cupcake batter in a bowl until smooth, then fill each liner about two-thirds full.
- Bake the cupcakes for 20-22 minutes, until a toothpick inserted in the center comes out clean. Let them cool completely on a wire rack.
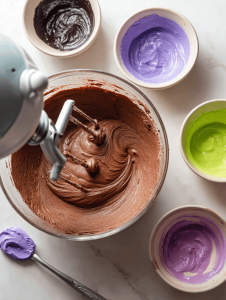
- While the cupcakes cool, prepare your frosting. Use an electric mixer to beat the chocolate frosting until smooth and slightly stiff, perfect for piping.
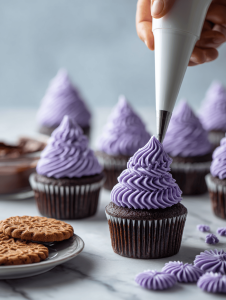
- Fill a piping bag fitted with a star tip with the frosting. Pipe rosettes or swirls on top of each cooled cupcake, covering the surface evenly.
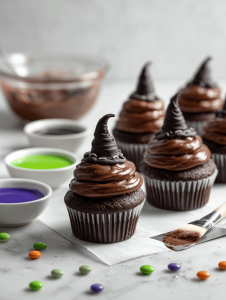
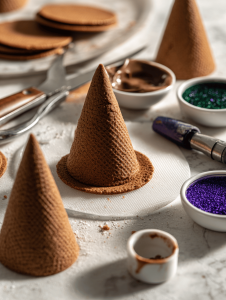
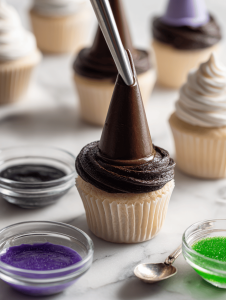
- Shape the cookies or wafers into cones resembling witch hats. If needed, gently cut or re-shape with a sharp knife to get a pointed tip.
- Use melted chocolate or icing to attach the cone-shaped cookies onto the frosted cupcakes, positioning the points upward to resemble hats.

- Add colorful details by piping small bands of chocolate or icing around the base of the cone and sticking on candy eyes or edible glitter for extra magic.
- Allow the decorations to set for a few minutes so the cones stay secure. Then, arrange your witch hat cupcakes on a platter and enjoy their spooky charm!
Notes

Founded by Rachel Morgan, a proud home cook and foodie from Austin, Texas, this blog is all about transforming everyday meals into moments of joy.