
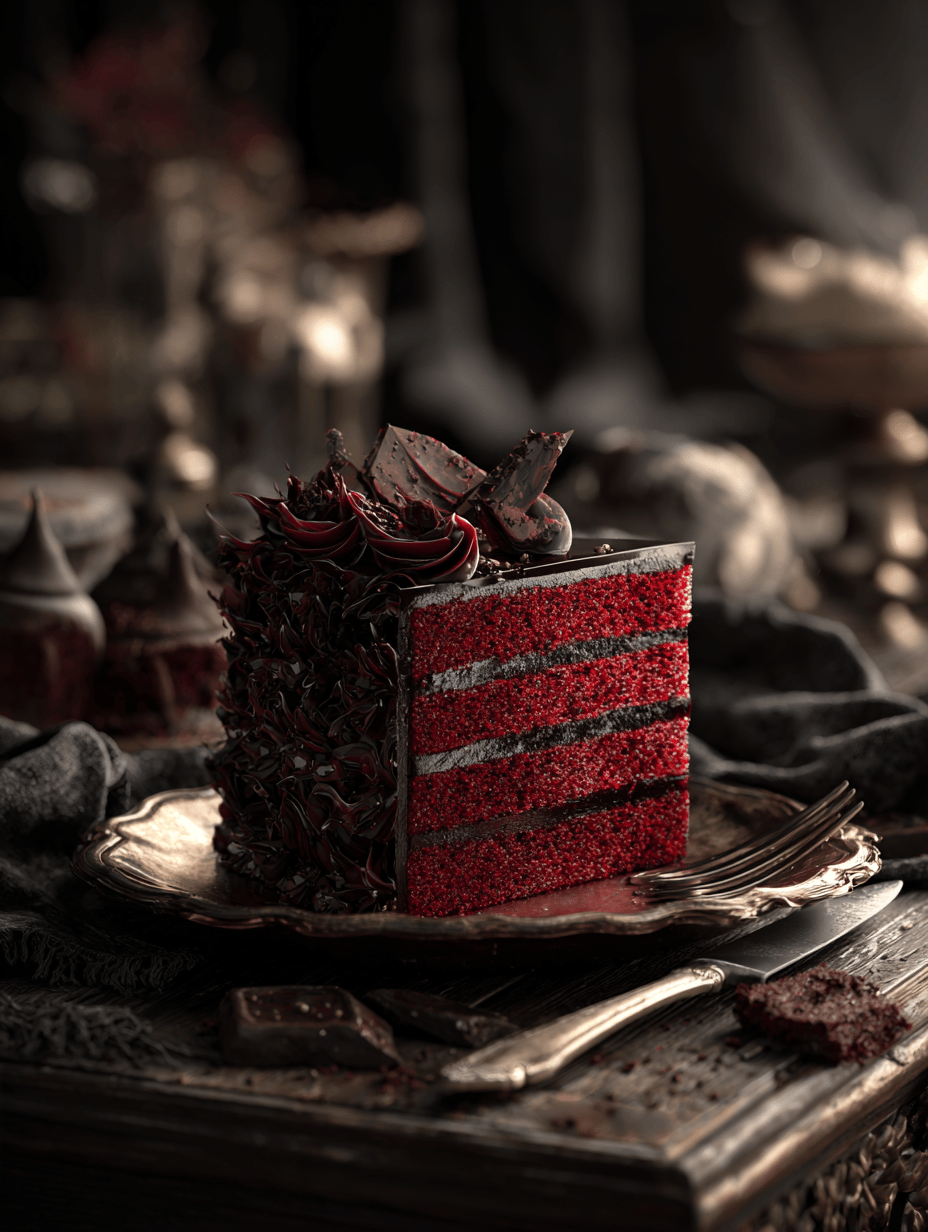
Red velvet cake has always held a certain dark charm for me. Its intense crimson hue feels like a secret, a whisper of decadence that’s hard to ignore. I love how baking it involves a little chaos—adding food coloring, adjusting for moisture—yet results in something so striking and rich.
Why I keep baking this bloody marvel
Its vibrant color and rich, tender crumb make every baking session a small celebration. The process is chaotic but rewarding, and the result always leaves people staring. It’s a reminder that a little chaos in the kitchen can lead to something unexpectedly beautiful and delicious.
Breaking down the crimson magic
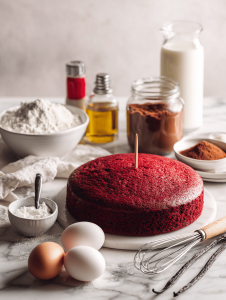
- All-purpose flour: Forms the soft, tender crumb; skip or swap with cake flour for a lighter texture.
- Unsweetened cocoa powder: Gives that deep chocolate flavor; Dutch-processed cocoa can be used for a smoother taste.
- Food coloring (gel preferred): Vivid and concentrated; use gel for vibrant color without thinning batter.
- Buttermilk: Adds tang and moisture; swap with milk plus a splash of vinegar if needed.
- Vegetable oil: Keeps the cake moist and tender; apple sauce can substitute for less fat.
- Sugar: Sweetens and tenderizes; brown sugar adds a caramel note.
- Eggs: Bind the batter; use flax eggs for vegan version.
- Vanilla extract: Enhances the overall flavor; almond extract adds a different aromatic twist.
- Salt: Balances sweetness and intensifies flavors.
- Chocolate or dark chocolate ganache: For decorating or extra richness; use high-quality chocolate for best flavor.
Tools of the trade for this crimson creation
- Mixing bowls: To combine dry and wet ingredients separately.
- Electric whisk: To beat eggs and sugar thoroughly, creating a light, airy mixture.
- Spatula: To fold ingredients gently and smooth out batter.
- Cake pan (23cm round): To give the cake its classic shape.
- Wire rack: To cool the cake evenly and prevent sogginess.
Step-by-step guide to achieving that bloody good velvet
Step 1: Preheat your oven to 180°C (350°F). Grease and line a 23cm (9-inch) round cake pan with parchment paper.
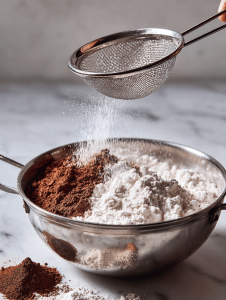
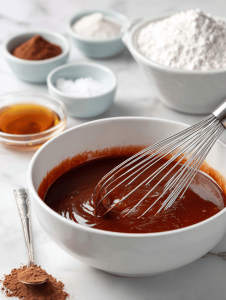
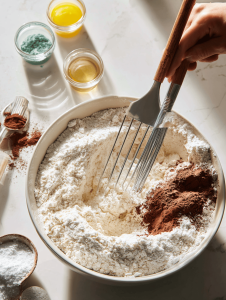
Step 2: In a large bowl, sift together 250g (2 cups) all-purpose flour, 30g (1/4 cup) unsweetened cocoa powder, 1 teaspoon baking soda, and 1/2 teaspoon salt.
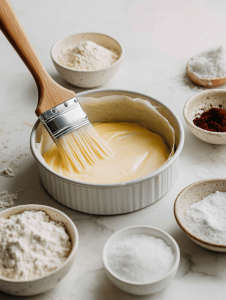
Step 3: In another bowl, whisk 2 large eggs, 200g (1 cup) sugar, and 240ml (1 cup) buttermilk until smooth. Add 120ml (1/2 cup) vegetable oil and a splash of vanilla extract; mix well.
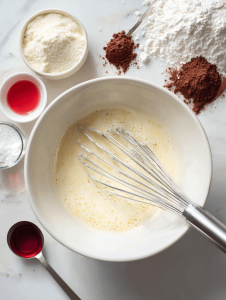
Step 4: Gradually add the dry ingredients to the wet, stirring gently until just combined. The batter should be smooth, with a rich, velvety texture.
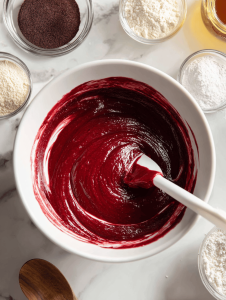
Step 5: Add a vibrant red gel food coloring—about 2 tablespoons—to the batter. Mix thoroughly until the color is evenly distributed and the batter is a deep, bloody hue.
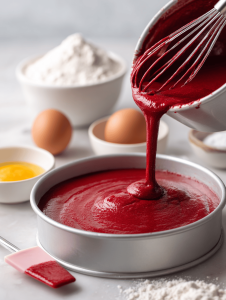
Step 6: Pour the batter into your prepared pan, smoothing the top with a spatula.
Step 7: Bake for 25-30 minutes, or until a toothpick inserted into the center comes out clean. The cake should be slightly domed and smell chocolaty with a hint of vanilla.
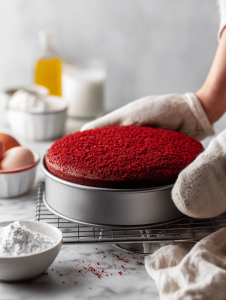
Step 8: Let the cake cool in the pan for 10 minutes, then turn out onto a wire rack to cool completely.
Step 9: Once cooled, slice and layer with cream cheese frosting or your preferred filling. Chill briefly to set the frosting.
Step 10: Serve chilled or at room temperature, with a drizzle of dark chocolate or a dusting of cocoa powder.
Cooking checkpoints and tips to keep in mind
- The batter should be a deep, uniform red, not streaky or pale.
- The cake edges should be just beginning to pull away from the pan when baked.
- The toothpick test is key—no wet batter, just moist crumbs.
- Allow the cake to cool completely before frosting to prevent melting or sliding.
Common pitfalls and how to fix them
- The cake turns out pale or unevenly colored.? Use less food coloring if you want a more subdued hue; too much can alter flavor.
- The cake is flat or dense.? Ensure baking soda is fresh to help the cake rise properly.
- The crumb is tough or rubbery.? Don’t overmix the batter; fold gently to keep it tender.
- The frosting melts or slides off.? Allow the cake to cool completely before frosting.
Red Velvet Cake
Ingredients
Equipment
Method
- Preheat your oven to 180°C (350°F). Grease a 23cm round cake pan and line the bottom with parchment paper.
- Sift together the flour, cocoa powder, baking soda, and salt into a large mixing bowl. This ensures an even, lump-free dry mixture.
- In a separate bowl, whisk the eggs and sugar using an electric whisk until the mixture is light, fluffy, and slightly pale, filling the air with a sweet, eggy aroma.
- Add the buttermilk, vegetable oil, and vanilla extract to the egg mixture, whisking until smooth and well combined. It should feel slightly thick and fragrant.
- Gradually fold the dry ingredients into the wet mixture with a spatula, mixing gently until just combined. The batter should be smooth, thick, and velvety.
- Add the gel food coloring—about 2 tablespoons—and mix thoroughly, creating a deep, blood-red hue throughout the batter. The color should be vibrant and uniform.
- Pour the batter into your prepared cake pan, smoothing the top with a spatula for an even surface.
- Bake for 25-30 minutes, or until a toothpick inserted into the center comes out clean. The cake will be slightly domed and smell rich with cocoa and vanilla.
- Allow the cake to cool in the pan for 10 minutes, then transfer it to a wire rack to cool completely. This prevents sogginess and helps develop a tender crumb.
- Once cooled, slice the cake horizontally if layering, spread with your favorite frosting, such as cream cheese, and assemble. Chill briefly to set the frosting if desired.
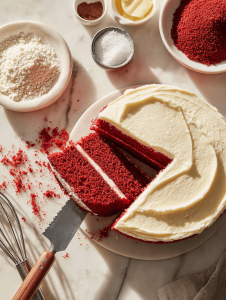
- Finish by decorating with chocolate ganache or dust with cocoa powder. Slice and serve chilled or at room temperature, enjoying the rich, velvety crumb and vibrant color.
Notes

Founded by Rachel Morgan, a proud home cook and foodie from Austin, Texas, this blog is all about transforming everyday meals into moments of joy.