
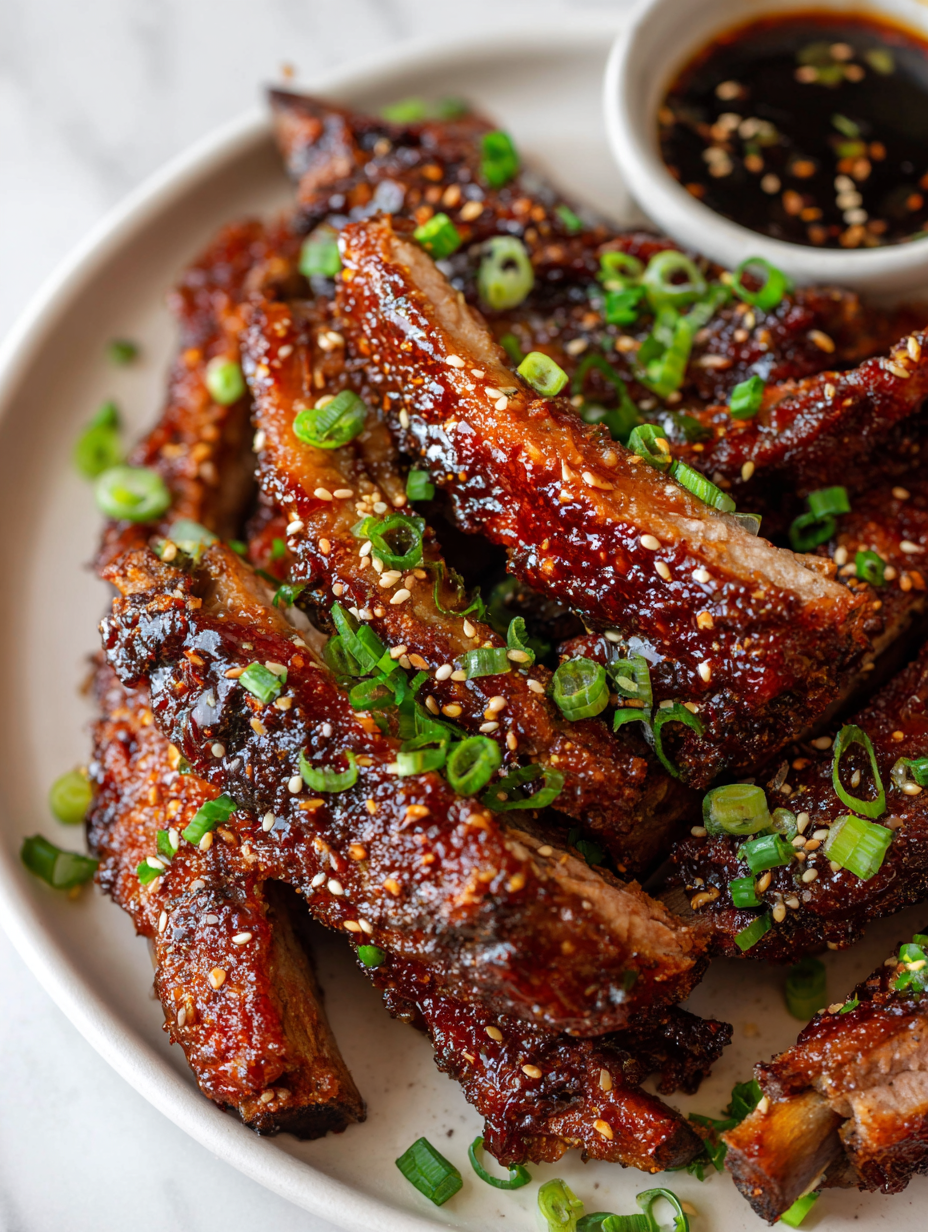
Sticky pork ribs aren’t just about the meat; they’re about the messy, beautiful glaze that clings to every inch. I love how the caramelized exterior catches the light, sticky and shiny, promising a mouthful of smoky-sweet heat. It’s a dish that feels like a warm hug, perfect for casual nights when you want something satisfying but not fussy.
This recipe is my go-to because it balances bold flavors without drowning in complexity. It’s honest, straightforward, and forgiving—glaze it to your taste, adjust the spice, and watch how the ribs transform into something almost addictive. It’s the kind of dish that makes you want to lick your fingers, then wipe them on your jeans just to keep the flavor going a little longer.
There’s something primal about reaching for sticky ribs with your hands, the messier the better. It’s comfort food that sparks joy in the chaos—no perfect plating here, just good, honest eating. I keep coming back to this recipe because it’s as much about the process as it is about the outcome, turning simple ingredients into a deeply satisfying, messy feast.
Focusing on the sticky glaze as a balance of sweet, smoky, and spicy, I see it as a culinary hug—messy, tender, and deeply satisfying, perfect for sharing in casual gatherings or cozy nights at home.
The sticky charm of slow-glazed ribs
- The sticky glaze reminds me of summer barbecues, messy and joyful, with that irresistible sweet-smoky aroma filling the air.
- There’s a rush of pride when I pull the ribs out, glaze perfectly caramelized, promising bites of savory, sticky goodness.
- Every time I make these, I feel like a kid sneaking seconds, the rich, spicy-sweet aroma making the whole house smell like comfort.
- Cooking these ribs is my little rebellion—messy, loud, and honestly, totally worth every sticky finger.
The story behind this recipe
- Making these sticky pork ribs started from a weekend where I was craving something deeply satisfying but didn’t want to fuss with complicated sauces. I remembered how my grandma used to slow-cook ribs in her smoky backyard, the aroma filling the air, sticky and inviting. I wanted to recreate that feeling—messy, flavorful, and honest—without needing a smoker or hours of work.
- It’s funny how a simple idea—glazing ribs with a balance of sweet, smoky, and spicy—can turn into a little ritual. Every batch feels like a small victory, a messy parade of caramelized edges and tender meat. It’s become my go-to for casual gatherings, when I want something that’s forgiving and genuinely satisfying, no fancy tricks needed.
- heading
- story_type
Sticky Ribs Trivia & Origins
- Pork ribs have been a staple in many Asian cuisines, especially in Chinese and Korean barbecue traditions, where sticky, flavorful glazes are prized.
- The concept of glazing meat with sweet and savory sauces dates back centuries, originally as a way to preserve and add flavor during long cooking processes.
- In the American South, sticky ribs became iconic through barbecue culture, with regional variations in spice and sweetness levels, often linked to communal gatherings.
- The term ‘sticky’ in cooking is believed to originate from the caramelization process when sugars in the glaze melt and form a shiny, tacky coating.
- Modern takes on sticky ribs often incorporate global flavors, blending smoky barbecue with Asian-inspired sweet soy or honey-based glazes.
Ingredient breakdown: key components
- Pork ribs: I prefer doing a quick boil first to loosen the collagen and start tenderizing—then I skip some of the longer oven time. You might want to try slow roasting if you’re after extra fall-apart texture.
- Brown sugar: It’s the backbone of that sticky, caramelized glaze. If you want it less sweet, cut back a bit or swap with honey for a more floral note. Just watch for burning if you reduce the liquid sugars.
- Soy sauce: Adds depth and umami. If you’re gluten-free, coconut aminos work well as a swap—just expect a slightly milder, sweeter finish.
- Smoked paprika: I love how it adds a subtle smoky complexity without needing a grill. If you don’t have it, chipotle powder will give you a similar smoky punch—just use a little less since it’s punchier.
- Garlic: Fresh is best for that punch of sharpness, but garlic powder can work in a pinch—just cut the amount in half to avoid overpowering the glaze’s sweetness.
- Honey: It’s the glue that makes the glaze sticky and shiny. If you’re out, maple syrup or agave can add sweetness with their own unique flair—just adjust for flavor intensity.
- Rice vinegar: Brightens everything up with a tangy kick. If you don’t have rice vinegar, apple cider vinegar is a good substitute—just don’t use too much to keep the balance.
Spotlight on key ingredients
Pork Ribs:
- I love how the meat’s marbled fat melts into tender, juicy bites, especially after slow cooking. If you prefer leaner meat, try pork tenderloin, but expect less richness.
- Brown sugar: It’s the backbone of that deep caramel glaze. If you want less sweetness, cut back slightly or swap with honey for a more floral note—watch for quick burning.
Smoked Paprika:
- Soy sauce: Adds that salty, umami punch that balances sweetness. Coconut aminos work as a gluten-free alternative, giving a milder, slightly sweeter profile. The saltiness intensifies during simmering, so adjust accordingly.
- Provides a subtle smoky aroma that’s crucial for depth. If you don’t have it, chipotle powder gives a similar smoky heat, but use less to avoid overpowering.
Notes for ingredient swaps
- Pork Ribs: I prefer baby back for tenderness, but spare ribs give more meat and a fattier bite—adjust cooking time accordingly.
- Brown Sugar: Try coconut sugar or maple syrup if you want a different sweetness profile; both lend a slightly different caramel flavor.
- Soy Sauce: Tamari is a good gluten-free alternative, offering similar umami without the wheat, though it might be a touch saltier.
- Smoked Paprika: Chipotle powder adds heat and smokiness if you don’t have smoked paprika—use sparingly to avoid overpowering.
- Honey: Agave syrup or maple syrup can replace honey, bringing their own rich, floral or earthy notes to the glaze.
- Rice Vinegar: Apple cider vinegar is a good swap—bright and tangy, but use a little less to keep balance in the glaze.
Equipment & Tools
- Roasting pan with rack: Holds ribs upright, allowing fat and juices to drain, even cooking.
- Basting brush: Applies the glaze evenly over the ribs for a sticky finish.
- Saucepan: Simmer and thicken the glaze to glossy perfection.
- Tongs: Handles hot ribs safely and allows for basting.
- Aluminum foil: Locks in moisture during initial baking, prevents drying out.
Step-by-step guide to sticky ribs
- Equipment & Tools: Gather a large roasting pan or baking sheet with a rack, a basting brush, tongs, a small saucepan for glaze, and aluminum foil for covering during cooking.
- Preheat your oven to 150°C (300°F). Place ribs on the rack in your pan, bone-side down. Cover tightly with foil. Bake for 2.5 to 3 hours until very tender, juices running clear when pierced.
- While ribs bake, prepare the glaze. Combine soy sauce, honey, garlic, smoked paprika, brown sugar, rice vinegar, and a splash of water in the saucepan. Bring to a simmer over medium heat (~90°C/194°F). Cook until thickened, about 10 minutes, stirring often. The sauce should be glossy and sticky, with a smoky aroma.
- When ribs are tender, remove from oven. Carefully peel back the foil and brush the ribs generously with the glaze. Increase oven temperature to 200°C (390°F).
- Return ribs uncovered to the oven. Bake for an additional 15-20 minutes, basting once halfway through. The glaze will bubble and caramelize, forming a shiny, sticky crust.
- Check for doneness. The glaze should be deep amber with a shiny, tacky surface. The meat should be tender and slightly pulling away from the bones.
- Rest the ribs for about 5 minutes. Slice into individual ribs or serve whole, drizzled with any remaining glaze. Enjoy with your favorite sides.
Let the ribs rest for 5 minutes after removing from the oven. Slice into individual ribs or serve whole, drizzled with any remaining glaze. Use tongs to serve, ensuring the sticky coating stays intact.
How to Know It’s Done
- The glaze is deeply caramelized, shiny, and sticky, coating the ribs evenly.
- Meat pulls slightly from the bones, with a tender, juicy texture when pierced.
- Ribs develop a crackling, caramelized crust that looks glossy and inviting.
Sticky Pork Ribs
Ingredients
Equipment
Method
- Preheat your oven to 150°C (300°F). Place the ribs on a rack inside a roasting pan, bone-side down, and cover tightly with aluminum foil. Bake for about 2.5 to 3 hours until the meat is tender and juices run clear when pierced.
- Meanwhile, prepare the glaze by combining soy sauce, honey, minced garlic, smoked paprika, brown sugar, rice vinegar, and water in a small saucepan. Bring to a gentle simmer over medium heat, stirring often. Cook until the mixture thickens slightly and turns glossy, about 10 minutes, filling your kitchen with a sweet, smoky aroma.
- Once the ribs are tender and cooked through, carefully remove the foil and peel it back to expose the surface. Use a basting brush to generously coat the ribs with the thickened glaze, ensuring every inch is covered with a shiny, sticky layer.
- Increase the oven temperature to 200°C (390°F). Return the glazed ribs to the oven uncovered and bake for an additional 15-20 minutes. During this time, baste the ribs once or twice to build a thick, crackling caramelized crust that glistens with sticky goodness.
- Check the ribs; they should be tender, with the glaze deeply caramelized and shiny. The meat will pull slightly away from the bones and have a crackly, sticky crust. Let the ribs rest for about 5 minutes to allow the juices to settle.
- Slice the ribs into individual portions or serve whole, drizzled with any extra glaze. Enjoy the messy, smoky, sweet goodness with your favorite sides for a casual, satisfying meal.
Pro tips for sticky ribs
- caramelization: Sear the ribs briefly before baking to develop a deeper, toasted flavor on the surface.
- sauce layering: Brush the glaze generously and repeatedly during the final bake to build a shiny, sticky crust.
- heat control: Keep an eye on the glaze near the end to prevent burning—if it darkens too fast, lower the oven temp slightly.
- tenderness check: Test the meat’s jiggle after initial baking—if it wobbles easily, it’s ready for glazing.
- finishing touch: Broil for 2-3 minutes after glazing to enhance caramelization and crackle the crust for extra texture.
Common mistakes and how to fix them
- TOO LITTLE SAUCE: Brush more generously to avoid dry, bland ribs—glaze should be thick and sticky.
- OVERCOOKED: Ribs can become mushy if baked too long—check tenderness with a gentle jiggle after 2.5 hours.
- BURNED GLAZE: If the glaze darkens too fast, lower oven temp or cover ribs with foil midway to prevent burning.
- UNDER-GLAZED: Don’t skimp on brushing; a thick, glossy coating develops flavor and appealing shine.
Quick fixes and pantry swaps
- When sauce is too thin, splash in a little cornstarch slurry and simmer until glossy.
- If ribs are too dry, patch with a quick brush of warm glaze and broil briefly.
- Splash some water or broth if glaze is too thick or sticky, then stir to loosen.
- DUMPED too much sugar? Patch with a splash of soy and a squeeze of lemon for balance.
- When glaze shimmers and crackles, it’s ready—rescue with a quick brush of fresh glaze if needed.
Prep, store, and reheat tips
- You can prepare the glaze a day ahead; keep it in the fridge to allow flavors to meld and intensify. Reheat gently before using—smells smoky and sweet, ready for brushing.
- Assemble the ribs and start the initial slow bake a few hours ahead. Once cooked and cooled, wrap tightly in foil or plastic wrap. They develop a richer flavor as they sit, with meat tender and juices locked in.
- Store leftovers in an airtight container in the fridge for up to 3 days. The glaze may thicken slightly but reheat with a splash of water or broth to loosen, restoring that sticky gloss and smoky aroma.
- Reheat in the oven at 180°C (350°F) covered with foil for about 20 minutes, or until heated through. Finish with a quick broil or torch for a shiny, crackly exterior. The smell should turn sweet and smoky, and the texture juicy with a slight crisp.
Top questions about sticky pork ribs
1. How do I pick the best pork ribs?
Look for ribs with a good layer of fat and firm meat. The fat melts during cooking, keeping the meat juicy and flavorful.
2. How can I make the glaze stick better?
Use a brush to coat the ribs with glaze. For a thicker coating, apply multiple layers during the final baking stage.
3. What’s the right oven temp and time?
Bake ribs at low temperature (around 150°C/300°F) for about 2.5-3 hours until tender and juices run clear.
4. How do I fix dry ribs?
If ribs seem dry, brush with more glaze and broil briefly to re-glaze and add shine.
5. How do I get that shiny, sticky coating?
Cook the glaze until it’s thick and glossy, then brush generously over the ribs during the last minutes of baking.
6. What’s the internal temp for perfect ribs?
Use a meat thermometer to check internal temperature; 70°C (160°F) is ideal for tender, cooked ribs.
7. Should I rest the ribs before serving?
Let the ribs rest for 5 minutes after baking to allow juices to redistribute before slicing.
8. How do I prevent the glaze from burning?
If the glaze burns, lower the oven temp or cover the ribs with foil during the final stage.
9. What tools do I need for glazing?
Use tongs to handle hot ribs, and a basting brush for even glaze application. Keep everything ready before glazing.
10. How do I store and reheat leftovers?
Refrigerate leftovers in an airtight container for up to 3 days. Reheat in the oven covered with foil for best results.
These sticky pork ribs aren’t just about the flavor—they’re about the messy, satisfying process of slow-cooking and glazing that keeps everyone coming back for more. The aroma of caramelized sugar mingling with smoky spice fills the kitchen, making the whole house feel welcoming and warm.
In the end, it’s the imperfections—the slightly charred edges, the sticky glaze that drips down your chin—that make this dish memorable. It’s a reminder that good food isn’t about perfection but about honest, joyful eating, especially when shared with friends or family around a cluttered table.

Founded by Rachel Morgan, a proud home cook and foodie from Austin, Texas, this blog is all about transforming everyday meals into moments of joy.