Blog

  • Fizz Up Your Day: The Unexpected Charm of Coke Slushie

    Fizz Up Your Day: The Unexpected Charm of Coke Slushie

    Imagine capturing the fizzy thrill of a soda fountain in icy form. The Coke slushie offers a nostalgic burst of sweetness and carbonation, perfect for warm days or any moment craving a touch of childhood joy. Its vibrant, shimmering surface invites you to indulge in a chaotic swirl of flavors that still makes grown-ups giggle.

    This recipe turns an ordinary soda into a frosty masterpiece that dances on your tongue, blending balance and chaos in every sip. Whether you’re at a summer party or just seeking a fun solo treat, this slushie is your new go-to for instant refreshment. It’s surprisingly simple—five ingredients, quick freeze, and mix—yet endlessly customizable.

    Coke Slushie

    The Coke slushie is a frozen beverage made by blending carbonated cola with crushed ice to create a icy, fizzy treat. It has a smooth, slushy texture with a shimmering surface, capturing the flavors of soda in a frozen form. Bright and playful, it offers a nostalgic burst of sweetness and carbonation with every sip.
    Prep Time 10 minutes
    Total Time 10 minutes
    Servings: 2
    Course: Main Course
    Cuisine: Mixed
    Calories: 150

    Ingredients
      

    • 2 cups cola soda chilled
    • 1 cup crushed ice preferably crushed for smooth blending
    • 2 tbsp simple syrup optional for extra sweetness
    • 1 pinch salt enhances flavor
    • 1 slug mint sprig for garnish (optional)

    Equipment

    • Measuring cup
    • Blender
    • Freezer

    Method
     

    1. Pour the chilled cola into a measuring cup and ensure it’s cold for the best slush consistency.
    2. Add the crushed ice to a blender, then pour over the cola soda carefully.
    3. Sprinkle in a pinch of salt and add the simple syrup if you’d like extra sweetness.
    4. Secure the lid on the blender and pulse until the mixture is smooth and slushy, with a vibrant, fizzy surface.
    5. Check the texture; it should be thick, chilled, and easily scoopable with a spoon.
    6. Scoop the slushie into tall glasses, garnishing with a sprig of mint if desired for a fresh touch.

    Notes

    For a more intense flavor, chill the glasses beforehand. You can also add fruit syrups or flavorings for variety.
    The Coke slushie is more than just a cold drink; it’s a sprinkle of nostalgia with a splash of rebellion against the ordinary. As the ice crunches and the cola aroma hits your nostrils, you realize how little it takes to turn a simple soda into a celebration.

    In a world full of complicated recipes, sometimes all we need is a glass of fizz and a little frozen chaos. Keep this easy recipe in your back pocket for spontaneous gatherings or those moments when a little sparkle is just what you need to brighten your day.

  • Spooky Charming: The Halloween Ghost Veggie Platter

    Spooky Charming: The Halloween Ghost Veggie Platter

    Every October, my kitchen transforms into a haunted gallery of colors and textures. But this year, I wanted to craft something more than just a feast for the senses — I aimed for a scare with smiles. The Halloween Ghost Veggie Platter is not just a dish; it’s my playful way of turning healthy snacks into ghostly figures that delight both kids and adults alike.

    Using simple vegetables and a dash of creativity, I created floating spirits that look just spooky enough to thrill. It’s the kind of food that brings the table to life, inviting everyone to indulge in a bit of edible art. The joy of making these little ghostly shapes is matched only by the fun of watching them disappear into eager hands.

    Halloween Ghost Veggie Platter

    The Halloween Ghost Veggie Platter features cut vegetables arranged into ghostly shapes, often using cauliflower, celery, and cheese. These veggie spirits are assembled with simple cutting and shaping techniques, creating playful edible art that maintains a crisp texture and fun visual appeal. Perfect for festive gatherings, they invite both kids and adults to enjoy healthy snacks with a spooky twist.
    Prep Time 15 minutes
    Total Time 15 minutes
    Servings: 4
    Course: Main Course
    Cuisine: American
    Calories: 50

    Ingredients
      

    • 1 head large cauliflower for ghost bodies
    • 3-4 stalks celery for ghost arms and legs
    • 4-6 slices cheddar cheese for faces or accents
    • optional black olives or raisins for eyes

    Equipment

    • Sharp Knife
    • Cutting board
    • Serving Plate

    Method
     

    1. Begin by breaking the cauliflower into small, manageable florets with your hands or a knife, creating ghostly shapes of different sizes.
    2. Slice the celery stalks into thin, legible strips or small sticks to resemble ghost arms and legs.
    3. Cut the cheddar cheese into small circles or shapes that can be attached as faces or decorative accents on the cauliflower ghosts.
    4. Arrange the cauliflower florets on a large serving plate, spacing them out to mimic floating ghosts, and attach celery pieces as arms and legs using toothpicks if needed.
    5. Add small pieces of cheese onto the cauliflower to create face features, and place tiny dots of black olive or raisin for eyes to give each ghost a spooky smile.
    6. Gently press all components into place, adjusting the shapes to ensure they look playful and ghostlike, with some variation in height and size for visual interest.
    7. Serve the platter immediately for maximum crispness and visual impact, inviting everyone to grab a spooky veggie ghost to enjoy.

    Notes

    For extra fun, let kids help with shaping and decorating the veggie ghosts. Keep the vegetables refrigerated until ready to serve to maintain freshness and crunch.

    This veggie platter isn’t just a healthy snack — it’s a storytelling canvas packed with charm and chaos. It’s perfect for casual gatherings or spooky movie nights, offering a playful break from the usual platter chaos. Plus, it’s a fantastic way to sneak some greens into a holiday that’s often all about sugar.

    As the season shifts, this simple, striking spread helps keep the spooky spirit alive without the fuss. Handmade details bring a personal touch that resonates with children and grown-ups alike, making every bite a moment of holiday cheer.

  • White Chicken Chili: A Cozy, Unusual Holiday Twist

    White Chicken Chili: A Cozy, Unusual Holiday Twist

    Imagine a chilly evening where you crave something warm, hearty, yet unexpectedly bright in flavor. White chicken chili fits that bill, offering a creamy, spicy embrace with each spoonful. Its subtle blend of herbs and tender chicken make it a comforting choice that isn’t your typical chili.

    What makes this recipe stand out is its approach to flavor—gentle heat, smoky hints, and bright lime accents turn a familiar dish into a memorable meal. Plus, it’s surprisingly quick to make, perfect for busy weeknights or when guests drop by unannounced. This chili feels like a culinary hug you can make in under 30 minutes.

    Whether you’re craving something different from the classic red bean chili or seeking a crowd-pleasing dish for the holiday table, this version offers a welcome change. It celebrates the creaminess of white beans and the succulent texture of shredded chicken—a combo that won’t disappoint. And it’s versatile: loaded with fresh toppings or enjoyed plain, it always hits the spot.

    White Chicken Chili

    White chicken chili is a creamy, spicy soup made with tender shredded chicken, white beans, and a flavorful broth infused with herbs, lime, and smoky hints. It has a smooth, hearty texture with a bright, fresh finish, often topped with cheese or cilantro for added freshness.
    Prep Time 10 minutes
    Cook Time 20 minutes
    Total Time 30 minutes
    Servings: 4
    Course: Main Course
    Cuisine: American
    Calories: 320

    Ingredients
      

    • 1 lb boneless, skinless chicken breasts or thighs, shredded after cooking
    • 1 can white beans drained and rinsed
    • 4 cups chicken broth
    • 1 cup diced onion
    • 2 cloves garlic minced
    • 1 teaspoon ground cumin
    • 1/2 teaspoon smoked paprika
    • 1 lime lime juiced
    • 1 tablespoon olive oil
    • salt and pepper to taste

    Equipment

    • Large pot or Dutch oven
    • Wooden spoon or spatula

    Method
     

    1. Heat olive oil in a large pot over medium heat. Add the diced onion and cook, stirring occasionally, until it becomes translucent and fragrant, about 3-4 minutes.
    2. Add the minced garlic, cumin, and smoked paprika to the pot. Cook for about 30 seconds, stirring, until the spices are fragrant.
    3. Place the chicken breasts into the pot and pour in the chicken broth. Bring to a gentle simmer, then cover and cook for 10-12 minutes, or until the chicken is cooked through and tender.
    4. Remove the cooked chicken from the soup and shred it using two forks. Return the shredded chicken to the pot.
    5. Add the drained white beans to the soup and stir well. Let everything simmer together for another 5 minutes to allow the flavors to meld.
    6. Turn off the heat and squeeze fresh lime juice into the soup. Adjust seasoning with salt and pepper to taste, stirring to combine.
    7. Ladle the hot white chicken chili into bowls, and serve with optional toppings like cilantro, shredded cheese, or a dollop of sour cream if desired.

    Embracing this white chicken chili means welcoming a dish that’s both simple and satisfying. It’s perfect for cozy nights when you want flavor without fuss. Once you’ve tried it, you might find yourself turning to this recipe again and again—an unexpected favorite in your comfort food repertoire.

    As the seasons shift, this chili stays relevant, offering warmth without heaviness. Its clean, fresh flavors are a refreshing change from heavier stews. This dish isn’t just a meal—it’s an invitation to gather, share, and enjoy the quiet magic of a truly good bowl of chili.

  • The Unexpected Charm of Taco Soup: A Cozy Election Day Staple

    The Unexpected Charm of Taco Soup: A Cozy Election Day Staple

    As the leaves turn and election season heats up, I delve into a recipe that turns voting day into a comfort fest. Taco soup isn’t just about bold flavors—it’s about reclaiming simplicity amidst chaos. Each spoonful smells of cumin-laced brag, a reminder that good food can be a quiet act of rebellion.

    This soup is a celebration of what’s already in your pantry, a reminder that cozy nights and political debates both benefit from a warm, hearty bowl. Imagine the aroma of salsa mingling with melted cheese, simmered to perfect richness. It’s straightforward, unpretentious, and the perfect antidote to pre-election frustration.

    Taco Soup

    Taco soup is a hearty, flavorful stew combining ground meat, beans, corn, and tomatoes seasoned with cumin and chili powder. The dish is simmered until rich and thick, with a slightly chunky texture and vibrant aromas of spices and fresh ingredients. It results in a warming bowl with a mix of tender meat and vegetables in a savory broth.
    Prep Time 10 minutes
    Cook Time 30 minutes
    Total Time 40 minutes
    Servings: 4
    Course: Main Course
    Cuisine: American
    Calories: 250

    Ingredients
      

    • 1 lb ground beef or turkey or any ground meat of choice
    • 1 medium onion chopped
    • 2 cloves garlic minced
    • 1 cup salsa adds flavor and moisture
    • 1 can (15 oz) diced tomatoes with juice
    • 1 can (15 oz) black beans rinsed and drained
    • 1 cup corn kernels frozen or canned
    • 2 tsp cumin ground
    • 1 tsp chili powder
    • 2 cups beef broth or vegetable broth
    • to taste salt and pepper

    Equipment

    • Large pot or Dutch oven
    • Wooden spoon or spatula

    Method
     

    1. Heat the large pot over medium heat and add the ground meat, breaking it apart with a spatula. Cook until browned and cooked through, about 5-7 minutes, until it develops a rich aroma.
    2. Add the chopped onion and minced garlic to the meat, stirring to combine. Cook until the onion is translucent and fragrant, about 3-4 minutes.
    3. Pour in the salsa and diced tomatoes with their juice, stirring to blend all the flavors evenly. Let it simmer for 2 minutes to meld.
    4. Add the rinsed black beans, corn kernels, cumin, and chili powder. Stir well to distribute the spices and vegetables evenly throughout the mixture.
    5. Pour in the beef broth and bring the mixture to a gentle simmer. Reduce the heat to low and let it cook uncovered for about 15-20 minutes, stirring occasionally, until the soup thickens slightly and flavors deepen.
    6. Taste the soup and season with salt and pepper as needed. Adjust spices to your preference for extra flavor.
    7. Serve the taco soup hot, garnished with your favorite toppings like shredded cheese, sour cream, or chopped fresh herbs if desired.
    Making taco soup feels like a tiny victory—claiming a flavorful moment amid a hectic schedule. It’s the kind of dish that encourages lingering at the table, basking in its welcoming warmth. Whether you’re celebrating or just surviving the day, this soup offers a comforting pause.

    So, when the evening settles, and the last ballot is cast, a bowl of taco soup reminds us that some of the best moments are simple, shared, and served hot.

  • The Secret Chilled: A Frozen Strawberry Escape

    The Secret Chilled: A Frozen Strawberry Escape

    Imagine a hot summer day when the air smells like ripe strawberries and sunshine. You crave something cold, sweet, and a little unexpected. This strawberry slushie isnt just a drink; its a cooling burst of summer on a spoon.

    I love how this recipe transforms simple fruit into a frozen feast. Its so versatile and quick to whip up, perfect for spontaneous treats or weekend chill-outs. Plus, the fresh strawberry aroma mingling with icy whispers always reminds me of childhood.

    Strawberry Slushie

    A strawberry slushie is a frozen beverage made by blending ripe strawberries with ice and sweetener until smooth and icy. The result is a vibrant pink, slushy texture that is thick enough to spoon and perfect for hot summer days. Its refreshing consistency combines fruity flavor with a chilly, granular finish.
    Prep Time 5 minutes
    Total Time 5 minutes
    Servings: 2
    Course: Main Course
    Cuisine: summery
    Calories: 150

    Ingredients
      

    • 1 pint fresh strawberries hulled and hulled
    • 1 cup ice cubes
    • 2 tbsp honey or simple syrup adjust to taste

    Equipment

    • Blender
    • Measuring cups and spoons

    Method
     

    1. Place fresh strawberries into the blender, ensuring they are evenly distributed.
    2. Add the ice cubes over the strawberries, creating a mound that covers the fruit entirely.
    3. Pour in the honey or simple syrup to sweeten the mixture, starting with two tablespoons.
    4. Secure the lid on the blender and blend on high speed until the mixture is smooth and uniformly icy, about 30-45 seconds. You should see a thick, slushy consistency with tiny ice particles.
    5. Stop the blender and check the texture; if it’s too thick, add a splash of water or juice and blend briefly again to loosen.
    6. Pour the slushie into chilled glasses, allowing the icy mixture to mound slightly above the rim for a frosty look.
    7. Serve immediately with a straw or spoon, and enjoy the cooling burst of fresh strawberry flavor.
    This strawberry slushie isnt just about beating the heat. Its a refreshing reminder of how simple ingredients can bring big smiles. When you need a quick escape from everyday chaos, let this icy delight take over.

    Next time the weather throws a tantrum, I reach for my blender and a handful of strawberries. The result is a sweet, icy escape that cools more than just my tongue, but my mood as well.

  • Fizzy Winter Wonderland: The Champagne Slushie Revival

    Fizzy Winter Wonderland: The Champagne Slushie Revival

    Every winter, I crave something that sparkles as much as the holiday lights. That’s when I rediscover my love for champagne slushies, a surprisingly effortless treat that screams celebration. But this isn’t your typical frozen cocktail—it’s a nostalgic swirl of champagne chill and fruity zest, perfect for gatherings or just a cozy night in.

    This recipe has turned into my secret weapon for unexpected guests or a midday pick-me-up. I love how the icy texture captures the crisp aroma of champagne, mingling with hints of citrus and berries. It’s a reminder that a simple frozen drink can bring a little chaos of joy to winter’s calm.

    Champagne Fruit Slushies

    Champagne fruit slushies are frozen beverages made by blending champagne with fruity ingredients like berries and citrus, resulting in a crisp, icy texture. The mixture is pureed until smooth, creating a sparkling, colorful drink with a slushy consistency perfect for celebrations or cozy nights.
    Prep Time 10 minutes
    Total Time 10 minutes
    Servings: 4
    Course: Main Course
    Cuisine: American
    Calories: 150

    Ingredients
      

    • 1 bottle champagne preferably chilled
    • 1 cup frozen berries such as strawberries or raspberries
    • 1 cup fresh citrus juice orange or lemon, freshly squeezed
    • 2 tablespoons honey or simple syrup optional, for sweetness

    Equipment

    • Blender
    • Measuring cups and spoons

    Method
     

    1. Pour the chilled champagne into a blender, filling it about halfway.
    2. Add the frozen berries to the blender, distributing them evenly over the champagne.
    3. Pour in the fresh citrus juice, which adds a bright, zesty flavor to the mixture.
    4. If you want a sweeter slush, add the honey or simple syrup now.
    5. Secure the lid on the blender and blend on high until the mixture is completely smooth and icy, about 30-60 seconds.
    6. Check the consistency—if it’s too thick, add a splash more citrus juice or champagne and blend briefly again.
    7. Pour the slushy mixture into glasses, garnishing if desired with extra berries or citrus slices for a festive look.
    8. Serve immediately to enjoy the crisp, icy texture and sparkling flavor.

    Notes

    For a less alcoholic version, use sparkling water or soda instead of champagne.
    Making a champagne slushie feels like a small act of rebellion against the dull grind of winter days. It’s a burst of fun, a splash of sparkle, and a dash of nostalgia that refreshes both the palate and the spirit. This recipe is perfect for nights when you wish the season’s magic could last forever.

    As the slushie melts slowly on a chilly evening, I find bits of summer laughter blended into icy bites. It’s a reminder that some delights are timeless, regardless of the weather. Cheers to easy, bubbly moments that turn any ordinary evening into something special.

  • Harvest Comfort: Fall Turkey Chili with Sweet Potatoes

    Harvest Comfort: Fall Turkey Chili with Sweet Potatoes

    As the leaves turn fiery and the air gains a whisper of chill, I reach for recipes that warm both the heart and the belly. This Fall Turkey Chili with Sweet Potatoes transforms ordinary ingredients into a symphony of flavor and seasonality, making it perfect for cozy evenings or casual gatherings.

    The unexpected sweetness of roasted sweet potatoes contrasts beautifully with the savory spiced turkey, creating a dish that’s how I imagine autumn should taste. Every spoonful carries the earthy aroma of cinnamon and cumin, mingling with the smoky richness of the turkey and the gentle sweetness of the potatoes.

    This recipe is a celebration of chaos and comfort—an easy yet satisfying fix when the night calls for something hearty. It’s a dish that gathers the house around the table, filling the room with warmth and anticipation.

    Fall Turkey Chili with Sweet Potatoes

    This turkey chili incorporates tender ground turkey and roasted sweet potatoes, simmered with spices to create a hearty and flavorful dish. The final chili has a thick, chunky texture with a rich aroma of cinnamon, cumin, and smoky undertones, ideal for warming up cozy autumn nights.
    Prep Time 15 minutes
    Cook Time 40 minutes
    Total Time 55 minutes
    Servings: 4
    Course: Main Course
    Cuisine: American
    Calories: 350

    Ingredients
      

    • 2 medium sweet potatoes peeled and diced
    • 1 tablespoon olive oil
    • 1 pound ground turkey lean
    • 1 medium onion chopped
    • 2 cloves garlic minced
    • 1 teaspoon ground cumin
    • 1 teaspoon ground cinnamon
    • 1 teaspoon chili powder
    • 1 can (14 oz) diced tomatoes with juices
    • 1 cup chicken broth
    • Salt to taste
    • Black pepper to taste

    Equipment

    • Baking sheet
    • Large pot or Dutch oven
    • Stirring spoon

    Method
     

    1. Preheat your oven to 400°F (200°C). Spread the diced sweet potatoes on a baking sheet, drizzle with olive oil, and toss to coat evenly.
    2. Roast the sweet potatoes in the oven for about 20-25 minutes until they are tender and lightly caramelized, stirring halfway through for even cooking.
    3. While the sweet potatoes roast, heat a large pot over medium heat. Add a splash of olive oil and sauté the chopped onion until it becomes translucent and fragrant, about 5 minutes.
    4. Add the minced garlic to the onions and cook for another minute until fragrant, listening for a gentle sizzle.
    5. Stir in the ground turkey, breaking it apart with your spoon, and cook until browned throughout, about 7-8 minutes. The meat should lose its pink color and develop a nice sear.
    6. Add the cumin, cinnamon, and chili powder to the meat mixture, stirring well to coat the turkey evenly with the spices and to release their aroma.
    7. Pour in the diced tomatoes with their juices and the chicken broth. Mix everything thoroughly, scraping up any bits stuck to the bottom of the pot for flavor.
    8. Bring the chili to a simmer, then lower the heat to maintain a gentle bubbling. Cover and let cook for about 15 minutes to meld the flavors.
    9. Add the roasted sweet potatoes into the chili, gently folding them in to preserve their shape.
    10. Simmer the chili uncovered for another 10 minutes to allow the flavors to deepen and the mixture to slightly thicken.
    11. Taste and season with salt and black pepper, adjusting according to your preference.
    12. Once the chili is rich and fragrant, serve hot in bowls, garnished optionally with fresh herbs or a dollop of sour cream for extra comfort.

    Notes

    For a spicier kick, add a dash of cayenne pepper or hot sauce. Leftovers taste even better the next day as flavors meld.

    In a world rushing too fast, this chili offers a pause — a moment to savor deep, layered flavors. It’s a reminder that good things take time, especially when pulled from simple pantry staples transformed into something soulful.

    Let the seasons inspire your cooking. This dish isn’t just food; it’s a ritual of comfort and renewal, perfect for those crisp fall evenings when everything feels just right.

  • Whimsical Vegan Pumpkin Soup: A Cozy Surprise for Fall

    Whimsical Vegan Pumpkin Soup: A Cozy Surprise for Fall

    As the leaves turn fiery shades and a crispness fills the air, I find myself craving comfort with a twist. This vegan pumpkin soup brings a surprising hint of toasted sesame and citrus zest, turning a simple fall staple into something extraordinary. It’s the kind of dish that sparks joy both in the aroma and in every velvety spoonful.

    Instead of the usual cinnamon overload, I experimented with a splash of coconut milk and a sprinkle of smoked paprika, giving it a smoky depth. The vibrant orange color on my table feels like a warm invitation to slow down. It’s perfect for those chilly evenings where you want to relax with a bowl of something familiar yet new.

    Vegan Pumpkin Soup with Sesame and Citrus Zest

    This vegan pumpkin soup features a smooth, velvety texture achieved through blending cooked pumpkin and aromatics. The soup is enhanced with toasted sesame oil, citrus zest, and a splash of coconut milk, giving it a smoky depth and vibrant appearance. It is served warm with an inviting orange hue and garnished for an extra layer of flavor.
    Prep Time 10 minutes
    Cook Time 30 minutes
    Total Time 40 minutes
    Servings: 4
    Course: Main Course
    Cuisine: Fall, Vegan
    Calories: 150

    Ingredients
      

    • 2 cups cooked pumpkin or puréed pumpkin preferably fresh or canned
    • 1 tablespoon toasted sesame oil for richness and aroma
    • 1 cup vegetable broth for simmering and blending
    • 1/2 cup coconut milk adds creaminess and smoky depth
    • 1 teaspoon citrus zest orange or lemon, for brightness
    • 1 small onion finely chopped
    • 2 cloves garlic minced
    • 1/2 teaspoon smoked paprika for smoky depth
    • to taste Salt and pepper

    Equipment

    • Large pot
    • Blender
    • Wooden spoon

    Method
     

    1. Heat the large pot over medium heat and add a splash of toasted sesame oil. Sauté the finely chopped onion until it becomes soft and translucent, filling your kitchen with a sweet aroma.
    2. Add the minced garlic and smoked paprika to the onions, cooking for another minute until fragrant and slightly toasted.
    3. Pour in the vegetable broth and bring the mixture to a gentle simmer, allowing the flavors to meld for about 5 minutes.
    4. Add the cooked or puréed pumpkin to the pot, stirring well to combine all the aromatics and ingredients, and cook for 5 minutes to let the flavors deepen.
    5. Pour in the coconut milk, stirring to incorporate, then simmer for another 5 minutes to heat through and allow the flavors to meld.
    6. Remove the soup from heat and carefully blend it using a blender until very smooth and velvety, being cautious of hot splashes.
    7. Return the blended soup to the pot if needed, then stir in the citrus zest and season with salt and pepper to taste. Warm it gently over low heat for a few minutes.
    8. Taste and adjust seasoning as desired, adding more salt, pepper, or citrus zest for brightness.
    9. Serve the soup hot, garnished with additional citrus zest or a drizzle of sesame oil if desired, for a beautiful presentation.

    This pumpkin soup isn’t just a meal; it’s a small celebration of the season’s bounty. Every spoonful reminds me why I adore cooking—transforming simple ingredients into something memorable. Plus, it’s plant-based, so it feels good to enjoy it guilt-free this time of year.

    As the nights grow longer, I find myself craving these cozy, nourishing bowls more and more. The flavors evoke memories of autumn walks and crackling fires, grounding me amid the chaos of daily life. This soup is a gentle reminder to pause and savor what autumn has to offer.

  • Monster Burgers for a Haunted Halloween Bash

    Monster Burgers for a Haunted Halloween Bash

    Every year, Halloween parties become more about the spectacle and less about the usual. This year, I wanted to create something that sparks both nostalgia and a dash of chaos: Monster Burgers. These aren’t your average sandwiches; they’re a canvas for creepy, fun, and surprisingly delicious design.

    Crafting these monsters is part art, part chaos — a chance to let your creativity run wild with toppings and textures. The smell of sizzling beef mixed with crispy edges and a hint of smoky flavor makes the kitchen feel like a haunted house of savory delights. It’s a perfect way to spice up your spooky night with a meal that’s as imaginative as it is tasty.

    Monster Burgers

    Monster Burgers are creatively assembled beef patties topped with various fun and spooky garnishes. The burgers are cooked until nicely browned with crispy edges, then decorated with toppings that give them a playful and monstrous appearance. The final dish features juicy, flavorful beef with a crispy exterior and imaginative, colorful decorations.
    Prep Time 20 minutes
    Cook Time 15 minutes
    Total Time 35 minutes
    Servings: 4
    Course: Main Course
    Cuisine: American
    Calories: 650

    Ingredients
      

    • 1 lb ground beef 80/20 for juiciness
    • 4 pieces burger buns preferably soft and sturdy
    • for seasoning to taste salt and pepper
    • 1 cup shredded lettuce
    • 1 large tomato sliced into rounds
    • 1 cup sliced cheese cheddar or American
    • as needed ketchup
    • as needed mustard
    • various pieces spooky toppings such as olives, cherry peppers, sliced peppers, cheese slices for eyes and mouth

    Equipment

    • Grill or skillet
    • Spatula
    • Knife
    • Cutting board
    • Baking sheet (optional)

    Method
     

    1. Preheat your grill or skillet over medium-high heat until hot and slightly smoky.
    2. Portion the ground beef into four equal-sized balls, then gently flatten them into patties about ¾ inch thick. Season both sides with salt and pepper.
    3. Carefully place the patties onto the hot cooking surface. Cook for about 4-5 minutes per side, until they develop a browned, crispy exterior and are cooked through.
    4. While the patties cook, prepare your toppings: slice tomatoes, shred lettuce, and set out cheese slices and spooky decorations like olives or peppers.
    5. Once cooked, remove the patties from heat and let them rest for a minute to relax and lock in juices.
    6. Toast the burger buns lightly, if desired, on the grill or in a toaster, to add a lightly crispy, warm base for each burger.
    7. Assemble each monster burger by placing a beef patty on the bottom bun, then layer with cheese, lettuce, and tomato slices.
    8. Decorate the burgers with spooky toppings to create monster features—use olives for eyes, peppers for mouths, or cheese slices for crazy hair.
    9. Spread ketchup and mustard as desired, then top with the bun immediately before serving to keep the decorations intact.
    10. Serve immediately, allowing everyone to enjoy the vibrant, spooky, and flavorful monster burgers.

    Monster Burgers are more than just a Halloween novelty; they are a celebration of chaos and creativity at the dinner table. The excitement in assembling each monstrous face makes every bite a little more memorable. Plus, the playful presentation keeps the kids (and adults) giggling through the feast.

    In a season filled with tricks and treats, these burgers add a hearty, fun twist that everyone can enjoy. Whether you’re hosting a spooky gathering or just craving something utterly unique, this recipe turns normal into extraordinary. Just beware of the messy, delicious chaos!

  • Whimsical Pumpkin Cheesecake with a Cinnamon Swirl Gravity Defy

    Whimsical Pumpkin Cheesecake with a Cinnamon Swirl Gravity Defy

    Baking a pumpkin cheesecake isn’t just about the rich, comforting flavors; it’s about exploring the magic of ingredient transformations. Imagine pumpkin puree dancing into a silky cheesecake batter, crowned with a cinnamon swirl that defies gravity. This approach transforms a traditional dessert into an artistic display of flavors and textures.

    The beauty of this recipe isn’t only in its taste but in how it plays with expectations. The unexpected swirl pattern, combined with the warm aroma of autumn spices, makes it a conversation starter. It’s perfect for those who love to reinvent classics with a playful twist.

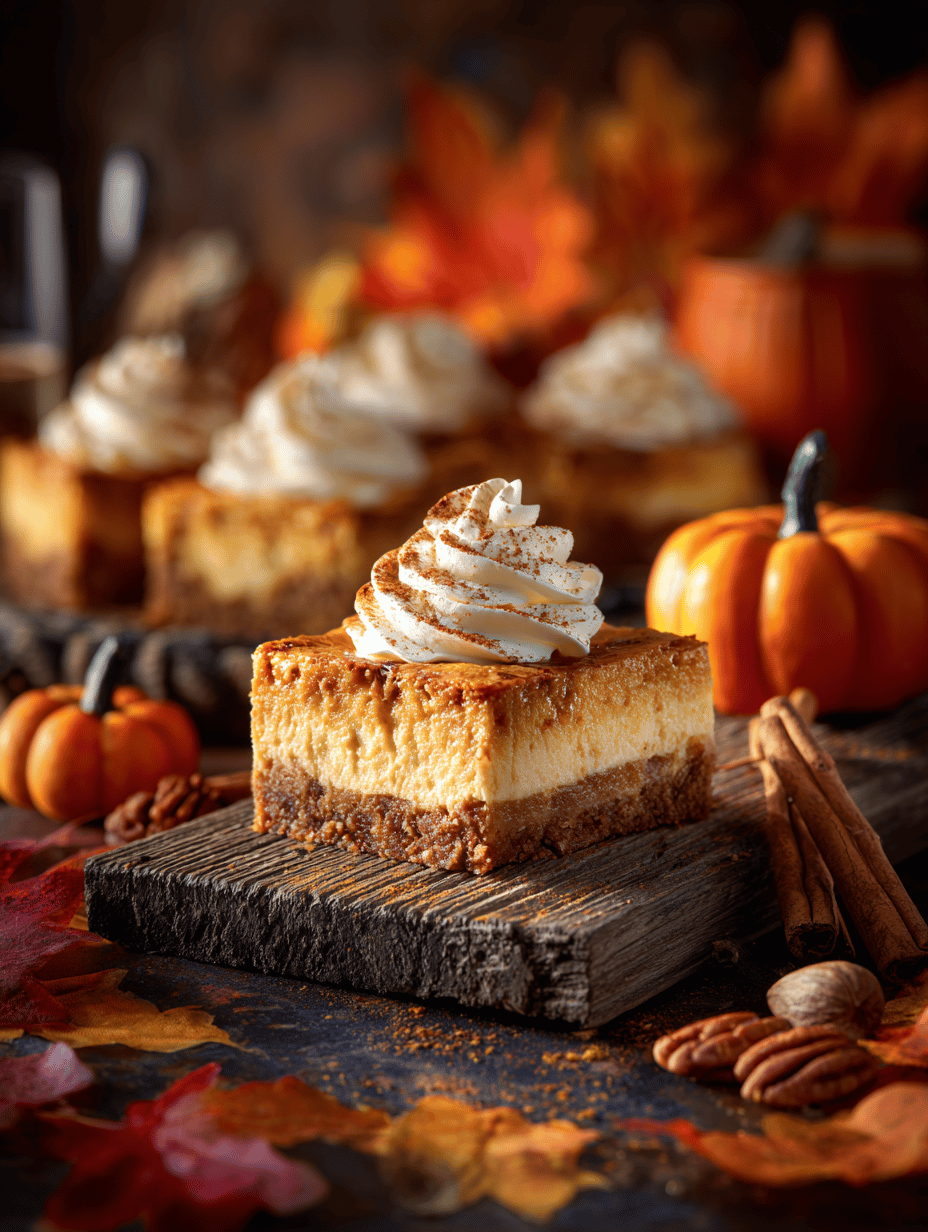
    Pumpkin Swirl Cheesecake

    This pumpkin swirl cheesecake features a creamy, smooth filling made with pumpkin puree and warm spices, baked to a silky texture. The dessert is topped with a cinnamon swirl pattern that creates a striking visual contrast. Its final appearance is a firm, glossy surface with artistic cinnamon marbling, offering a delightful balance of flavors and textures.
    Prep Time 20 minutes
    Cook Time 1 hour
    Total Time 1 hour 20 minutes
    Servings: 8
    Course: Main Course
    Cuisine: American
    Calories: 410

    Ingredients
      

    • 1 cup graham cracker crumbs for crust
    • 3 tablespoons unsalted butter melted
    • 2 cups cream cheese softened
    • 1 cup granulated sugar
    • 1 cup pumpkin puree canned or homemade
    • 3 large eggs
    • 1 teaspoon cinnamon ground
    • 1/2 teaspoon nutmeg ground
    • 1/4 teaspoon cloves ground
    • 1 tablespoon all-purpose flour to help with swirl
    • 2 tablespoons cinnamon for swirl

    Equipment

    • Mixing bowls
    • Hand mixer or stand mixer
    • 9-inch springform pan
    • Spatula
    • Spoon
    • Toothpick or skewer

    Method
     

    1. Mix the graham cracker crumbs with melted butter in a bowl until evenly combined. Press this mixture into the bottom of a springform pan to form the crust, then set aside.
    2. In a large mixing bowl, beat the softened cream cheese and granulated sugar until smooth and creamy, using a hand or stand mixer. This creates a fluffy, uniform base for the filling.
    3. Add the pumpkin puree and spices—cinnamon, nutmeg, and cloves—to the cream cheese mixture and mix until fully incorporated. The mixture will turn a rich, orange hue and smell warm and inviting.
    4. Beat in the eggs one at a time, ensuring each egg is fully mixed before adding the next. The batter will thicken and become silky in texture.
    5. Pour the pumpkin cheesecake filling over the prepared crust in the springform pan, smoothing the top with a spatula for an even layer.
    6. In a small bowl, combine a tablespoon of flour with two tablespoons of cinnamon to prepare the cinnamon swirl mixture. Stir well until combined to prevent clumping.
    7. Add dollops of the cinnamon mixture on top of the cheesecake batter at regular intervals, then use a toothpick or skewer to gently swirl the cinnamon into the batter, creating a marbled pattern.
    8. Place the springform pan into a baking water bath and bake at 325°F (160°C) for about 60 minutes, until the edges are set but the center still slightly jiggles when gently shaken.
    9. Remove the cheesecake from the oven and let it cool on a wire rack for at least 2 hours. Refrigerate for 4 hours or overnight for best results, until the surface is glossy and the texture is firm.
    10. Once fully cooled, carefully run a knife along the edges of the springform to loosen the sides and gently remove the springform ring. Slice and serve to reveal the beautiful cinnamon swirl pattern.

    Notes

    Ensure the cheesecake is fully cooled before removing the springform ring to prevent cracking. For a more pronounced swirl effect, add more cinnamon mixture before swirling.
    This pumpkin cheesecake isn’t just a treat; it’s a celebration of seasonal abundance turned into edible art. Whether you’re sharing it at a gathering or enjoying a quiet moment with tea, the layers of flavor will captivate your senses.

    As the season shifts and pumpkins take center stage, this recipe offers a chance to create something memorable. The blend of sweet, spice, and cream is a gentle reminder of traditions with a spirited modern twist, promising joy in every bite.