
Mummy Brownies aren’t just about the rich, dark chocolate—they’re about the memories wrapped in every bite. Baking them feels like a little ritual, a way to connect with past versions of yourself who loved simple, honest desserts. It’s a recipe that’s been passed down, tweaked, and loved for its comforting, slightly chaotic charm.
Why I Keep Coming Back to These Brownies
They remind me of childhood chaos, of sneaking bites before dinner, of cozy weekends. Each batch turns out slightly different—sometimes fudgier, sometimes crackly on top. They’re imperfect, honest, a little messy—just like life, and that’s why I keep making them.
What’s in the Magic (and What You Can Swap)
- Dark chocolate: Gives that deep, smoky flavor. Use 70% cocoa for richness, or swap with semi-sweet if you prefer milder.
- Butter: Adds moisture and a velvety texture. Try salted butter for a hint of saltiness, or use margarine in a pinch.
- Eggs: Bind everything together. For a vegan version, try flax eggs.
- Sugar: Sweetens and helps create that fudgy texture. Brown sugar adds a caramel note; skip if you want cleaner flavor.
- Flour: Provides structure. Gluten-free blend works if you’re avoiding wheat.
- Vanilla extract: Enhances the chocolate. Almond extract can add a nutty twist.
- Salt: Balancing flavor. A pinch makes the chocolate pop.
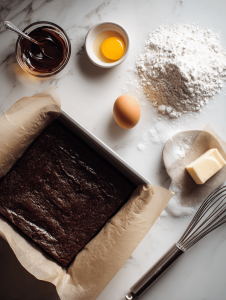
Tools of the Trade for Mummy Brownies
- Oven: To get the perfect bake
- 20cm (8-inch) square pan: Shape and contain the brownie batter
- Double boiler or heatproof bowl and saucepan: Gently melt chocolate and butter without burning
- Parchment paper: Eases removal and cleanup
- Spatula and whisk: Mix ingredients smoothly and evenly
How to Bring the Ghostly Goodness of Mummy Brownies to Life
Step 1: Preheat your oven to 175°C (350°F).
Step 2: Line a 20cm (8-inch) square baking pan with parchment paper, leaving an overhang.
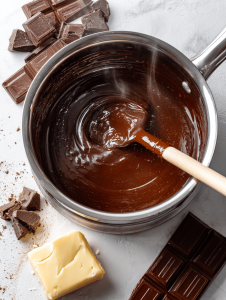
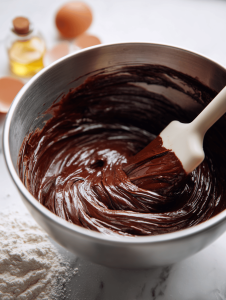
Step 3: Melt 125g (4.4 oz) of butter and 200g (7 oz) of good-quality dark chocolate together in a double boiler, stirring until smooth.
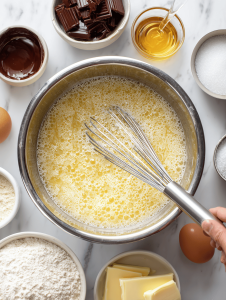
Step 4: In a large bowl, whisk 2 eggs with 150g (3/4 cup) of sugar until slightly frothy.
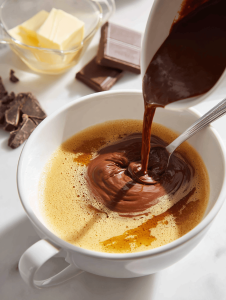
Step 5: Add the melted chocolate and butter mixture to the eggs and sugar; stir until well combined.
Step 6: Fold in 100g (3/4 cup) of all-purpose flour, a pinch of salt, and a teaspoon of vanilla extract.
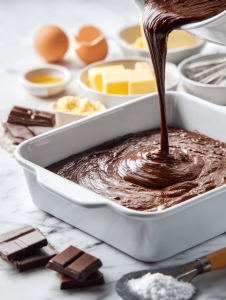
Step 7: Pour the batter into your prepared pan, smoothing the top with a spatula.
Step 8: Bake for 20-25 minutes. The edges should be set, and the center slightly gooey.
Step 9: Let cool in the pan for 10 minutes, then lift out using the parchment overhang and cool completely on a wire rack.
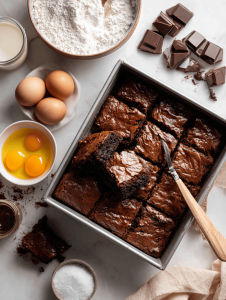
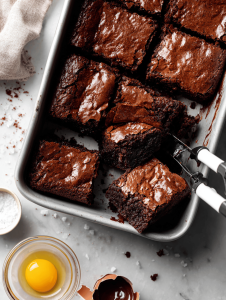
Step 10: Cut into squares and serve warm or at room temperature.
Key Moments for Perfect Mummy Brownies
- The chocolate should be glossy and smooth after melting.
- Edges pull away slightly from the pan, indicating doneness.
- The center should be slightly jiggly but not molten.
- A toothpick inserted in the center comes out with moist crumbs, not wet batter.
Common Pitfalls and How to Dodge Them
- Over-baking leading to dry brownies.? If the brownies are over-torched, reduce baking time by 5 minutes.
- Underbaking, resulting in a gooey mess.? If the center is raw, cover with foil and bake 3-5 minutes longer.
- Too dry, causing cracks on top.? If batter is too thick, stir in a splash of milk.
- Too high heat causing uneven rise.? If edges crack excessively, lower oven temperature slightly.

Mummy Brownies
Ingredients
Equipment
Method
- Preheat your oven to 175°C (350°F) and line your square pan with parchment paper, leaving a slight overhang for easy removal.
- Gently melt the dark chocolate and butter together in a double boiler or heatproof bowl set over simmering water, stirring until the mixture is smooth and glossy.
- In a large bowl, whisk the eggs and sugar together with a whisk until the mixture becomes slightly frothy and light in color, about 1-2 minutes.
- Pour the melted chocolate and butter into the egg mixture, stirring gently with a spatula until well combined and smooth.
- Fold in the flour, vanilla extract, and a pinch of salt, mixing just until you see no streaks of flour—be careful not to overmix.
- Pour the batter into your prepared pan, spreading it evenly with a spatula and smoothing the surface for a uniform bake.
- Bake in the preheated oven for 20-25 minutes, until the edges are slightly pull away from the pan and a toothpick inserted in the center comes out with moist crumbs.
- Remove the pan from the oven and let the brownies cool in the pan for about 10 minutes, allowing the center to set while the edges remain fudgy.
- Use the parchment overhang to lift the brownies out of the pan and transfer to a wire rack to cool completely, about 20 minutes.
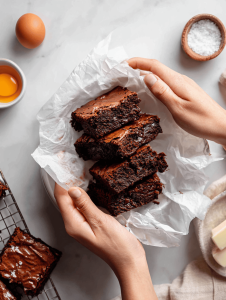
- Cut into squares with a sharp knife, revealing the dense, fudgy interior with a slightly crackly top, ready to serve warm or at room temperature.
Notes

Founded by Rachel Morgan, a proud home cook and foodie from Austin, Texas, this blog is all about transforming everyday meals into moments of joy.