
Getting boiled eggs just right is all about timing and gentle handling, especially if you want that tender, slightly creamy yolk. It’s a small task that demands patience and attention, but the payoff is worth it every single time. I’ve learned that the difference between a perfect egg and a rubbery one often comes down to a few seconds and a cool, quiet hand during the peel.
This recipe isn’t just about boiling eggs; it’s about understanding how to coax the best texture from each one. Whether you’re adding them to a salad, making deviled eggs, or just enjoying them plain, mastering this simple technique can turn a basic ingredient into something a little more special. It’s a quiet, everyday ritual that reminds me how small details make all the difference.
When I first started paying attention to the timing, everything changed. The eggs became consistently tender, and peeling was no longer a dreaded chore. Now, I keep a mental clock—timing every step with the precision of a quiet symphony—and it’s a simple joy to produce perfectly cooked eggs every time.
Focusing on the overlooked importance of precise timing and gentle handling to achieve perfectly tender, slightly creamy boiled eggs every time.
The story behind this recipe
- I remember the first time I tried boiling eggs for a big breakfast, and I ended up with overcooked, rubbery yolks. It was a small disaster that made me realize how delicate the process really is, especially when aiming for that perfect, tender center. Since then, I’ve obsessed over timing, temperature, and gentle handling, trying to crack the code of the simple boiled egg.
- One quiet Sunday, I sat with a pot of eggs, a clock, and a sense of curiosity. Each batch taught me something new—how a slight change in boiling time or cooling method could make all the difference. Over the years, this humble recipe became less about routine and more about mindful cooking, a little act of patience that rewards with a perfectly textured bite every time.
- heading: ‘The story behind this recipe’
Ingredient breakdown: key components
- Eggs: Fresh eggs with smooth shells feel sturdier, but older eggs peel easier—use what’s available, but expect a slightly looser shell if older.
- Water: I prefer starting with cold water for even cooking, but a quick boil from hot water can save time—just watch for cracking.
- Salt: A pinch of salt in the water helps prevent cracking and makes peeling a tad easier—don’t overdo it, or it might flavor the eggs too much.
- Vinegar (optional): A splash of vinegar can make peeling even simpler, especially if your eggs are a bit stubborn—use sparingly, it’s faintly tangy.
- Ice bath: Immersing eggs in an ice bath halts cooking instantly and firms up the shell—vividly cools down the heat, making peeling less frustrating.
- Timer: Precise timing—about 9-12 minutes—makes all the difference for a tender yolk and firm white, so keep that clock close.
- Peel: Gently cracking and peeling under running water keeps the shell intact and prevents tearing—patience here really pays off.
Spotlight on key ingredients
Eggs:
- Fresh eggs with smooth shells feel sturdier, but older eggs peel easier—use what’s available, but expect a slightly looser shell if older.
- Water: I prefer starting with cold water for even cooking, but a quick boil from hot water can save time—just watch for cracking.
- Salt: A pinch of salt in the water helps prevent cracking and makes peeling a tad easier—don’t overdo it, or it might flavor the eggs too much.
Water:
- Ice bath: Immersing eggs in an ice bath halts cooking instantly and firms up the shell—vividly cools down the heat, making peeling less frustrating.
- Timer: Precise timing—about 9-12 minutes—makes all the difference for a tender yolk and firm white, so keep that clock close.
Notes for ingredient swaps
- Eggs: Use slightly older eggs for easier peeling, or fresher for a more resilient shell—each has its perks and quirks.
- Water: Hard water can cause mineral deposits; switch to filtered or spring water if your eggs tend to crack or peel unevenly.
- Salt: Replace with baking soda in the water—this can help with peeling and slightly tenderizes the shell, especially if eggs are stubborn.
- Vinegar: A splash of lemon juice instead can brighten the flavor subtly and still aid in peeling, without the tang of vinegar.
- Ice bath: Instead of plain cold water, add a few drops of lemon or lime for a refreshing twist that also helps with peeling.
- Timer: Use your phone or a kitchen timer—precision is key but don’t stress if you’re a few seconds off, the eggs still turn out good.
- Peeling: Try peeling under running warm water if cold water doesn’t do the trick—sometimes warmth loosens the shell better.
Equipment & Tools
- Medium pot: Hold enough water for boiling eggs evenly.
- Slotted spoon: Gently lower and lift eggs to prevent cracking.
- Bowl of ice water: Quickly cool eggs after boiling, making peeling easier.
- Timer: Track precise cooking time for perfect yolk doneness.
Step-by-step guide to boiling eggs
- Gather your equipment: a medium pot, a slotted spoon, a bowl of ice water, and a timer. Fill the pot with enough cold water to cover the eggs by about an inch.
- Bring the water to a gentle boil over medium heat, around 100°C (212°F). Watch for small bubbles rising steadily.
- Once boiling, lower the eggs into the water using the slotted spoon. Reduce heat to low or just below to maintain a gentle simmer—about 85°C (185°F).
- Start timing immediately. Cook the eggs for exactly 9 to 12 minutes depending on your preferred yolk creaminess. Shorter for slightly runny, longer for firm.
- While eggs cook, prepare your ice bath: fill a bowl with cold water and ice, ready for quick cooling.
- When time’s up, carefully transfer eggs to the ice water using the slotted spoon. Let them sit undisturbed for at least 5 minutes to halt cooking and ease peeling.
- To peel, tap the eggs gently on a hard surface to crack the shell, then peel under running cold water or in the ice bath for less sticking. Pat dry.
- Rest the peeled eggs for a minute or two on a paper towel. Slice or serve whole, seasoned lightly with salt if desired.
Transfer eggs to ice bath, let cool completely. Pat dry, then peel carefully under running water. Slice or serve whole, seasoned if desired.
How to Know It’s Done
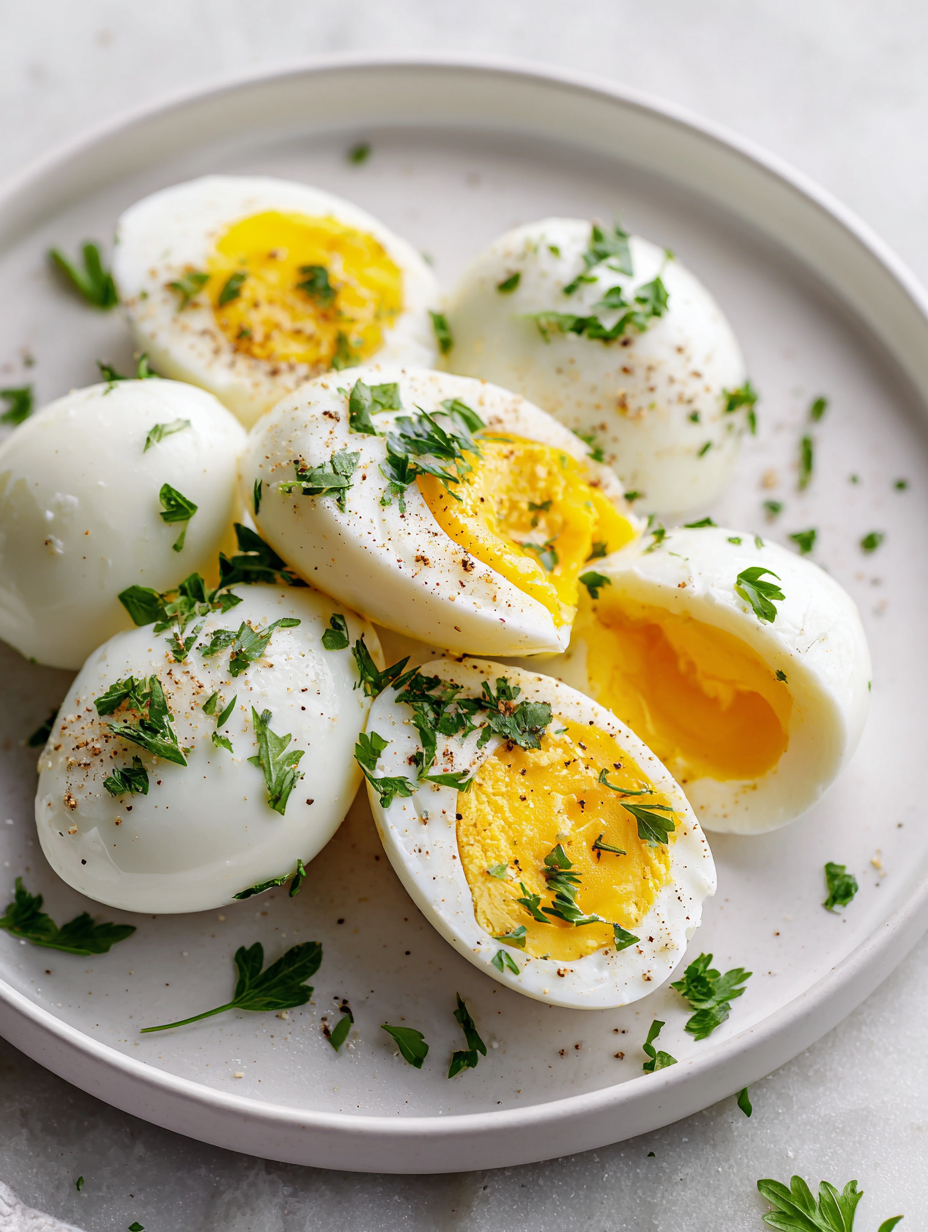
- Eggs feel slightly firm but not rubbery when gently pressed.
- Yolk is set but still tender, with a slightly creamy texture when cut.
- Eggshell cracks easily with gentle tapping, and peeling reveals a smooth white.
Perfect Boiled Eggs
Ingredients
Equipment
Method
- Place the eggs in a medium pot and cover them with cold water, about an inch above the eggs.
- Bring the water to a gentle boil over medium heat, watching for small, steady bubbles to form.
- Once boiling, use a slotted spoon to carefully lower the eggs into the water, one at a time, ensuring they don’t crack.
- Reduce the heat slightly to maintain a gentle simmer—small bubbles should continue rising steadily.
- Start your timer immediately and cook for exactly 9 to 12 minutes, depending on whether you prefer slightly runny or fully firm yolks.
- While the eggs cook, prepare an ice bath by filling a bowl with cold water and plenty of ice.
- When the timer goes off, use the slotted spoon to transfer the eggs into the ice bath, submerging them completely.
- Let the eggs sit in the ice bath for at least 5 minutes, which helps stop the cooking process and makes peeling easier.
- Gently tap each egg on a hard surface to crack the shell, then peel carefully under running cold water or in the ice bath to prevent tearing.
- Pat the peeled eggs dry with a paper towel, then enjoy them whole, sliced, or seasoned lightly with salt.
Notes
Pro tips for perfect boiled eggs
- Bolded mini-head: Start eggs in cold water → Ensures even heat transfer and reduces cracking risk.
- Bolded mini-head: Use a gentle simmer → Keeps whites tender and yolks creamy without jiggling too much.
- Bolded mini-head: Timing is everything → 9-12 minutes depending on your preferred yolk consistency.
- Bolded mini-head: Cool eggs quickly → Ice bath stops carryover cooking and keeps shells intact.
- Bolded mini-head: Crack eggs gently → Tap on the counter and peel under running water for smooth shells.
- Bolded mini-head: Adjust for size → Larger eggs need a couple more minutes, smaller eggs less time.
- Bolded mini-head: Don’t skip resting → Let eggs sit in the ice bath at least 5 minutes before peeling to ease shell removal.
Common mistakes and how to fix them
- FORGOT to cool eggs immediately → Use an ice bath to stop cooking instantly.
- DUMPED water too hot → Start with cold water for gentle, even heating.
- OVER-TORCHED yolks → Remove eggs at 9-12 minutes for perfect doneness.
- PEELED eggs tore apart → Peel under running cold water for smooth shells.
Quick fixes and pantry swaps
- When eggs crack during boiling → Splash a little vinegar in the water to help seal small cracks.
- If eggs stick to the shell → Patch with a gentle tap and peel under running cold water.
- When yolks are overdone → Shield from further cooking by transferring eggs to an ice bath immediately.
- Dumped hot water on eggs → Rescue by rinsing under cold water to stop cooking instantly.
- When shells are stubborn → Swap to slightly older eggs for easier peeling and less frustration.
Prep, store, and reheat tips
- Boiled eggs can be cooked and cooled several hours ahead, making breakfast prep smoother. Just keep them in their shells.
- Store peeled or unpeeled eggs in an airtight container in the fridge for up to a week. Peeled eggs may dry out faster.
- For best freshness, peel eggs just before eating or serving—peeling too early can make them rubbery or tear the white.
- Reheat peeled eggs gently in warm water for a few seconds if cold eggs feel too firm—avoid microwave heating to prevent rubberiness.
- The flavor and texture stay pretty consistent for about 5 days, but after that, whites may start to dry out and yolks dull in color.
Top questions about boiled eggs
1. How long should I boil eggs for different yolk textures?
A slightly runny yolk is achieved by boiling for about 6-7 minutes, while a firm yolk takes closer to 10-12 minutes.
2. Why do I need to use an ice bath after boiling eggs?
Cooling eggs in an ice bath immediately after boiling stops the cooking process, making peeling easier and yolks tender.
3. Are fresher eggs better for boiling?
Using older eggs makes peeling easier because the shell separates more readily from the membrane.
4. How do I peel boiled eggs cleanly?
Peel eggs under running cold water or in an ice bath to help loosen the shell and prevent tearing.
5. Can I add anything to the water to improve boiling eggs?
Adding a pinch of salt or vinegar to the boiling water can help prevent cracking and ease peeling.
6. Should I start with hot or cold water for boiling eggs?
Start with cold water and bring to a gentle simmer to prevent cracking and ensure even cooking.
7. How long can I keep boiled eggs in the fridge?
Boiled eggs can be stored in the fridge for up to a week, peeled or unpeeled, in an airtight container.
8. How do I reheat boiled eggs without overcooking them?
Reheat peeled eggs gently in warm water for a few seconds if they feel too cold or firm before serving.
9. How can I tell if boiled eggs are done?
To check doneness, the white should be firm and the yolk should be set but still tender.
10. What if my eggs crack while boiling?
If eggs crack during boiling, adding vinegar to the water helps seal small cracks and prevents white leakage.
Mastering the simple boiled egg reminds me how small, deliberate acts can bring a quiet satisfaction. It’s a humble skill, but one that rewards patience with tender, perfectly cooked eggs every time.
In a world full of complicated recipes, it’s comforting to return to this straightforward technique. Sometimes, the most basic ingredients and a little care create the most memorable bites.

Founded by Rachel Morgan, a proud home cook and foodie from Austin, Texas, this blog is all about transforming everyday meals into moments of joy.