
Making a chocolate fondant feels like embracing the beautiful mess of imperfections in life. That molten, gooey center is a reminder that sometimes, the best surprises come from the unexpected. It’s not about perfect timing or presentation, but about the joy of honest, slightly chaotic baking.
This recipe is a little like life—rich, a little unpredictable, and best enjoyed warm. I love how each one turns out slightly different, with that luscious, flowing chocolate spilling out when you crack into it. It’s a small reminder that even in the cracks, there’s a kind of beauty worth savoring.
Baking these feels like a quiet act of rebellion—rejecting the glossy, uniform desserts and instead celebrating the imperfect, the messy, the wonderfully human. It’s a chance to see beauty in the flaws and to let the molten center be a metaphor for embracing what makes us unique.
Focusing on how the molten center of a chocolate fondant can serve as a metaphor for embracing imperfections—each one a little surprise of richness that keeps the experience honest and memorable.
Embracing Imperfection with Molten Chocolate
- Learning to perfect the molten center taught me patience and precision in the kitchen.
- I love how this dessert feels like a little celebration—rich, indulgent, and unexpectedly gooey.
- Baking these always reminds me of cozy evenings and sharing quiet, sweet moments with loved ones.
- The way the chocolate spills out when you cut into it never gets old—pure, messy joy.
- Every time I make a fondant, I feel a little proud of turning simple ingredients into something so decadent.
The story behind this recipe
- I first stumbled upon this recipe during a chaotic week, looking for a simple way to impress without too much fuss. The rich aroma of melted chocolate and butter filling the kitchen felt like a small act of rebellion against the rush of daily life. It became our go-to after long days, a little indulgence that didn’t demand perfection but promised comfort.
- Baking this dessert reminds me that beauty often lies in the imperfect—those slightly cracked edges or the uneven rise. It’s a reminder that life, like a good fondant, is about embracing the molten surprises inside. Each time I make it, I feel a little more at home, a little more honest about the mess and magic in my kitchen.
- heading: Embracing Imperfection with Molten Chocolate
Chocolate Fondant Trivia
- Chocolate fondant, also known as molten lava cake, originated in France in the 1980s, with early recipes credited to Jean-Georges Vongerichten and Michel Bras.
- The dessert’s signature molten center was originally a happy accident—chefs discovered that slightly underbaking their cakes created that gooey surprise inside.
- In the UK, it’s often called a ‘chocolate fondant,’ while in the US, ‘lava cake’ is more common, reflecting regional naming quirks.
- The rich, flowing chocolate inside was once considered a revolutionary way to serve pudding, turning a simple cake into an interactive experience.
Key ingredients for perfect fondant
- Dark chocolate: I use a high-quality 70% cocoa bar that melts smoothly, giving that intense, slightly bitter note. If you prefer sweeter, go for 60%, but avoid milk chocolate for the molten core’s richness.
- Butter: I opt for unsalted, European-style butter for a richer, creamier melt. If you only have regular butter, add a tiny pinch of sea salt to enhance the chocolate’s depth.
- Eggs: Fresh, large eggs are best; they give structure and a silky texture. For a lighter feel, you can substitute a few whites, but don’t skip the yolks if you want that gooey center.
- Sugar: I stick to superfine caster sugar for quick dissolving, but regular granulated works fine—just mix a little longer. Too much sugar can make the fondant overly sweet and less molten.
- Flour: Just a touch—plain all-purpose flour is perfect. If you want a slightly denser cake, add a tablespoon more. Skip it for a more intensely fudgy center.
- Optional flavor: A splash of espresso or vanilla enhances the chocolate’s richness. If you want a twist, try a pinch of sea salt on top before baking for a salty sweet contrast.
- Optional add-ins: A few crushed hazelnuts or a sprinkle of sea salt flakes can elevate the experience. Just don’t overload, or you’ll lose that pure molten chocolate moment.
Spotlight on key ingredients
Dark chocolate:
- I use a high-quality 70% cocoa bar that melts smoothly, giving that intense, slightly bitter note. If you prefer sweeter, go for 60%, but avoid milk chocolate for the molten center’s richness.
- Butter: I opt for unsalted, European-style butter for a richer, creamier melt. If you only have regular butter, add a tiny pinch of sea salt to enhance the chocolate’s depth.
- Eggs: Fresh, large eggs are best; they give structure and a silky texture. For a lighter feel, you can substitute a few whites, but don’t skip the yolks if you want that gooey center.
Butter:
- Dark chocolate: I use a high-quality 70% cocoa bar that melts smoothly, giving that intense, slightly bitter note. If you prefer sweeter, go for 60%, but avoid milk chocolate for the molten center’s richness.
- I opt for unsalted, European-style butter for a richer, creamier melt. If you only have regular butter, add a tiny pinch of sea salt to enhance the chocolate’s depth.
- Eggs: Fresh, large eggs are best; they give structure and a silky texture. For a lighter feel, you can substitute a few whites, but don’t skip the yolks if you want that gooey center.
Notes for ingredient swaps
- Dairy-Free: Swap butter for coconut oil or a neutral plant-based butter. The flavor will be richer and slightly coconutty, but still deliciously indulgent.
- Vegan Chocolate: Use high-quality dairy-free dark chocolate and a flaxseed or aquafaba egg replacer. Expect a slightly different melt and less glossy finish.
- Sugar Alternatives: Substitute with coconut sugar or maple syrup. The texture may be a bit denser, and the sweetness might vary, so adjust accordingly.
- Gluten-Free: Replace all-purpose flour with almond flour or gluten-free baking mix. The crumb will be nuttier and slightly denser, but still fudgy.
- Lower Sugar: Reduce sugar by half for a less sweet, more intense chocolate flavor. The molten center remains rich but less sweet.
- Extra Rich: Add a tablespoon of coffee or espresso powder to intensify the chocolate’s depth. It gives a smoky, bold note that’s irresistible.
- Flavored Fillings: Incorporate a teaspoon of chili powder, sea salt flakes, or orange zest into the batter for a flavor twist that complements the chocolate.
Equipment & Tools
- Ramekins: For baking individual fondants and easy release.
- Double boiler or microwave: To melt chocolate and butter gently without burning.
- Whisk or electric mixer: To aerate eggs and sugar for a light batter.
- Sifter: To evenly incorporate flour and cocoa powder into the batter.
- Spatula: To fold ingredients gently and avoid knocking out air.
- Cooling rack or plate: To rest and invert the baked fondants smoothly.
Step-by-step guide to fondant
- Preheat your oven to 200°C (390°F). Grease 4 ramekins generously with butter and dust with cocoa powder—this helps the fondants release easily.
- Melt 200g of dark chocolate and 100g of butter together in a heatproof bowl over a double boiler or in short bursts in the microwave, stirring until smooth. Set aside to cool slightly.
- In a separate bowl, whisk 3 large eggs, 80g of superfine sugar, and a pinch of salt until well combined and slightly frothy—about 2 minutes by hand or 30 seconds in a mixer.
- Gently fold the cooled chocolate mixture into the egg-sugar mixture. Use a spatula to combine—don’t overmix, just until integrated.
- Sift 40g of all-purpose flour into the mixture and fold gently until just combined. For a more fudgy center, use less flour or skip entirely; for a lighter texture, add a tablespoon of cocoa powder.
- Divide the batter evenly among the prepared ramekins—fill about 3/4 full. Tap gently on the counter to remove air bubbles.
- Bake in the preheated oven for 12-14 minutes. The edges should be set, but the center still slightly jiggly when shaken—this indicates molten perfection.
- Remove from oven and let sit for 1 minute. Then, carefully invert each ramekin onto a plate. Let rest for 30 seconds, then gently lift the ramekin away—watch for the gooey center spilling out.
- Serve immediately. For an extra touch, dust with cocoa powder or a light sprinkle of sea salt. Pair with vanilla ice cream or fresh berries if desired.
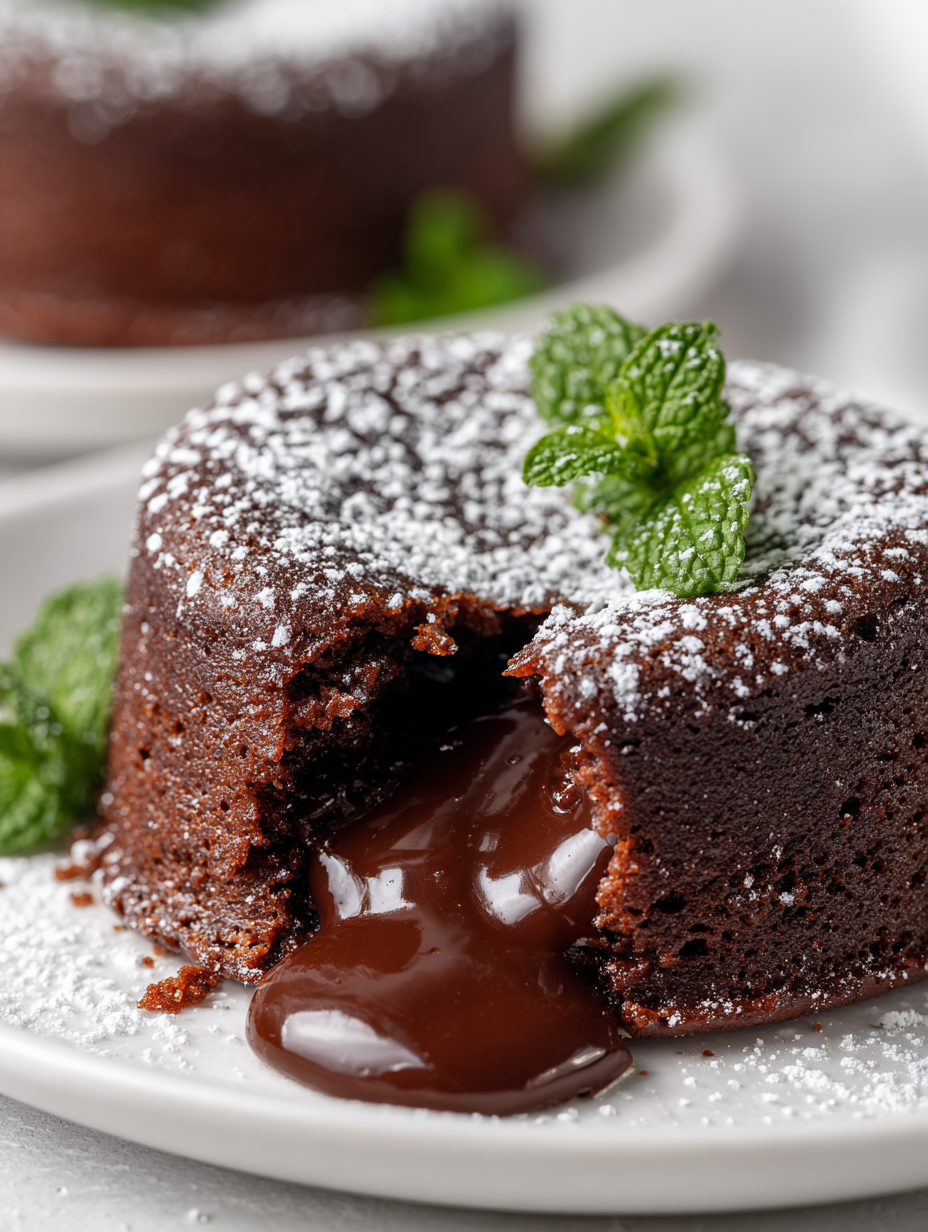
Let the fondants rest for 30 seconds after inversion to settle. Serve immediately while the center remains molten. Garnish with a dusting of cocoa or a sprig of herbs for presentation.
How to Know It’s Done
- Edges are firm but center jiggles slightly when shaken.
- A knife inserted around the edge comes out clean, with a molten center visible.
- Hitting the surface produces a crackle, and the chocolate flows when cut.
Molten Chocolate Fondant
Ingredients
Equipment
Method
- Start by preheating your oven to 200°C (390°F) and generously greasing four ramekins with butter, then dusting them lightly with cocoa powder to prevent sticking.
- Gently melt the dark chocolate and butter together in a double boiler or in short bursts in the microwave, stirring until smooth and glossy. Let this mixture cool slightly so it doesn't cook the eggs.
- In a separate bowl, whisk the eggs, sugar, and a pinch of salt until they are light, frothy, and slightly increased in volume—this creates a silky base for your fondant.
- Gently fold the cooled chocolate mixture into the eggs and sugar, using a spatula to keep the batter airy and smooth.
- Sift the flour into the batter and fold gently until just combined—be careful not to overmix, as this can deflate the batter and affect the molten center.
- Divide the batter evenly among the prepared ramekins, filling each about three-quarters full. Tap them gently on the counter to remove any air bubbles.
- Bake in the preheated oven for 12-14 minutes, until the edges are set but the center still wobbles slightly when shaken—that's your molten magic happening inside.
- Remove the ramekins from the oven and let them rest for about 30 seconds, then carefully invert each onto a plate. Gently tap or shake the ramekin to release the fondant, revealing the flowing, gooey center.
- Serve immediately while warm, optionally dusted with cocoa powder or topped with berries or a scoop of ice cream for extra indulgence.
Pro tips for perfect fondant
- Bolded mini-head: Use room temperature ingredients → Helps the batter come together smoothly and evenly.
- Bolded mini-head: Don’t overmix the batter → Keeps the fondant tender and prevents it from becoming dense.
- Bolded mini-head: Check for jiggle → The perfect bake has a slight wobble in the center when gently shaken.
- Bolded mini-head: Invert carefully → Use a warm plate and a gentle tap to release without cracking.
- Bolded mini-head: Serve immediately → This ensures the molten center stays gooey and inviting.
- Bolded mini-head: Slightly underbake → Better to err on the side of a soft center than overcooked, which kills the gooey texture.
- Bolded mini-head: Use high-quality chocolate → Melts smoothly and enhances the rich, intense flavor with every bite.
Common mistakes and how to fix them
- FORGOT to check oven temperature → Use an oven thermometer for accuracy.
- DUMPED batter into hot oven → Let the batter rest 5 minutes before baking.
- OVER-TORCHED the fondant → Bake for exactly 12-14 minutes, no longer.
- MISSED the resting time → Rest for 30 seconds after inversion to avoid cracks.
Quick fixes and pantry swaps
- If batter is too thick, splash in a teaspoon of warm water to loosen it.
- When fondants crack during unmolding, patch with a tiny dab of melted chocolate.
- Splash a pinch of salt into batter if chocolate is overly bitter.
- Shield edges with foil if they over-torch or darken too quickly during baking.
- When centers don’t flow, rescue by reheating in the microwave for 5 seconds, then serve warm.
Prep, store, and reheat tips
- You can prepare the batter up to a day in advance. Cover and refrigerate; the chocolate may firm up slightly, but gently warm before baking for best results.
- Baked fondants can be stored in an airtight container in the fridge for up to 2 days. Reheat in a warm oven (around 160°C/320°F) for 5-7 minutes until gooey again.
- The rich, molten center tends to thicken over time, so reheating briefly is key to restoring that flowing texture. Watch for a crackling top—indicating it’s ready.
- Frozen fondants can be wrapped tightly and kept for up to 1 month. Thaw overnight in the fridge, then reheat as above—expect a slightly firmer center.
Top questions about chocolate fondant
1. How do I know when my fondant is perfectly baked?
A molten center is achieved when the cake is baked just enough so the edges are firm but the center remains soft and slightly jiggly. Timing is key, usually around 12-14 minutes at 200°C (390°F).
2. What texture should the fondant have when done?
The best way is to gently shake the ramekin; the center should wobble slightly, like a liquid. The edges will be set and firm, but not dry or overcooked.
3. What kind of chocolate is best for fondant?
Use high-quality dark chocolate, preferably 70% cocoa, melted smoothly. For a richer flavor, add a splash of espresso or vanilla. Avoid milk chocolate for that deep, intense molten core.
4. How do I prevent the fondant from overbaking?
Overbaking makes the center firm and less molten. Underbaking risks the cake collapsing or being too runny. Find that sweet spot around 13 minutes for a gooey center.
5. How should I serve the fondant for maximum gooeyness?
Lightly dust your ramekins with cocoa powder or butter, then invert the fondant onto a plate gently after resting for about 30 seconds. Serve immediately for best molten effect.
6. Can I make fondants ahead of time?
Refrigerate baked fondants in an airtight container for up to 2 days. Reheat in a warm oven or microwave briefly until the center flows again. Freshly baked is always best.
7. Can I prepare the batter ahead?
Yes, batter can be prepared a day in advance and kept chilled. Bake directly from the fridge, adding an extra minute or two to the baking time.
8. What if my fondant doesn’t have a molten center?
If the center isn’t flowing, briefly microwave the fondant for 5 seconds to warm it up and restore that molten texture before serving.
9. What tools do I need for the perfect fondant?
Use ramekins that are oven-safe and well-greased. A warm plate helps with easy inversion. Keep a small spatula handy for gentle unmolding if needed.
10. How can I fix cracks or overcooked edges?
If the edges over-torch or darken too much, shield them with foil or reduce baking time slightly. For cracks, a tiny drizzle of melted chocolate can patch up the surface.
Baking a chocolate fondant feels like capturing a fleeting moment—rich, warm, and a little messy, just like life. When that molten center flows out with the first crack, it’s a small, imperfect triumph that reminds me why I love baking in the first place.
In these little moments of molten chocolate, I find a quiet pleasure—an honest, unpolished celebration of flavor and texture. Sometimes, the best surprises are the ones that don’t go perfectly, but still turn out unforgettable.

Founded by Rachel Morgan, a proud home cook and foodie from Austin, Texas, this blog is all about transforming everyday meals into moments of joy.