
Hell’s Kitchen Mac and Cheese isn’t about neatness or perfection. It’s about throwing everything into the pot and letting chaos happen. That gooey, cheesy mess—baked or stovetop—is a little rebellious, a little unpredictable, just like a real night in Hell’s Kitchen. And honestly, it’s the kind of dish that forgives your mistakes, pushes you to be creative, and makes you laugh at the mess you’ve made.
This recipe has become my go-to when I want something comforting but also a little wild. It’s a reminder that cooking doesn’t have to be polished—sometimes it’s about the rough edges, the spontaneous tweaks, and embracing the chaos. Plus, the smell of melting cheese and crisping bread crumbs is a chaos-friendly aroma that pulls everyone to the kitchen, no matter how hectic the day was.
Focusing on how Hell’s Kitchen Mac and Cheese isn’t just about comfort, but about embracing chaos in the kitchen — a dish that’s forgiving, spontaneous, and a little rebellious, just like a true hell’s kitchen experience.
Embracing Chaos in the Kitchen
- I love how this dish turns chaos into comfort—cheesy, messy, and utterly forgiving.
- There’s a thrill in tossing everything together without overthinking—sometimes the best flavors come from spontaneity.
- Nothing beats the smell of bubbling cheese and crispy breadcrumbs after a long, hectic day.
- Making this recipe reminds me that perfection isn’t the goal—embracing the mess is where the magic happens.
The story behind this recipe
- This recipe was born out of a late-night kitchen chaos, where I threw in whatever cheese and pasta I had left. It’s a dish that’s forgiving and unpolished, just like those frantic moments when cooking feels like a rebellion. I realized that the messier and more spontaneous it gets, the better it tastes—cheesy, crispy, and full of life.
- Every time I make this, it reminds me that good food doesn’t need to be perfect. Sometimes, the best flavors come from improvising under pressure and embracing the chaos. It’s the kind of comfort food that feels like a small act of rebellion, in the best way. And honestly, the smell of melted cheese and toasted breadcrumbs makes every kitchen moment worth it.
- heading
- story_type
Trivia and Origins
- This dish gained fame after being featured on Gordon Ramsay’s Hell’s Kitchen, where chaos and comfort collide.
- Mac and cheese has roots in 13th-century Italy, but the fiery, rebellious style like this is a modern American twist.
- The gritty, no-fuss attitude of this recipe mirrors the frantic energy of a busy professional kitchen.
- Cheese varieties in this dish often reflect regional preferences—sharp cheddar from the Midwest or smoky gouda from the West.
Ingredient breakdown
- Cheddar cheese: I love the sharp, tangy punch it gives—makes every bite bold. If you prefer milder, swap half for mozzarella for gooey meltiness.
- Pasta: I use cavatappi or elbow macaroni because they catch the cheesy sauce well. For a healthier spin, try whole wheat or chickpea pasta, but watch the texture change.
- Milk: Whole milk is my go-to for richness, but if you want lighter, almond or cashew milk works—just expect a slightly nuttier flavor.
- Butter: It adds that silky base and helps the cheese melt smoothly. For dairy-free, coconut oil is okay, but it lends a faint coconut scent.
- Breadcrumbs: I toast plain panko until golden for that crispy topping—try adding a pinch of smoked paprika or garlic powder for extra kick.
- Salt & pepper: Essential for seasoning the cheese sauce—don’t skimp, but taste as you go to avoid over-salting.
Spotlight on key ingredients
Cheddar cheese:
- I love the sharp, tangy punch it gives—makes every bite bold. If you prefer milder, swap half for mozzarella for gooey meltiness.
- Pasta: I use cavatappi or elbow macaroni because they catch the cheesy sauce well. For a healthier spin, try whole wheat or chickpea pasta, but watch the texture change.
Breadcrumbs & Milk:
- Breadcrumbs: I toast plain panko until golden for that crispy topping—try adding a pinch of smoked paprika or garlic powder for extra kick. The crunch should be light and crackly, not soggy.
- Milk: Whole milk is my go-to for richness, but if you want lighter, almond or cashew milk works—just expect a slightly nuttier flavor. It should be warm, not boiling, to help the cheese melt smoothly.
Notes for ingredient swaps
- Dairy-Free: Swap regular cheese for a blend of soaked cashews blended with nutritional yeast and lemon juice. It won’t melt exactly like cheese but adds a cheesy depth.
- Gluten-Free: Use rice or corn-based pasta instead of traditional wheat. Keep an eye on cooking times; they tend to cook faster and can get mushy.
- Vegan: Replace butter with coconut oil or vegan margarine, and use plant-based milk like oat or soy milk. For cheese, try vegan shredded options or a cheesy nutritional yeast mixture.
- Cheese Varieties: Swap sharp cheddar for smoked gouda or Monterey Jack for different flavor profiles. Experimenting can give your dish a smoky or milder twist.
- Breadcrumbs: Use crushed gluten-free crackers or toasted nuts for topping. Add a pinch of smoked paprika for extra smoky crunch or garlic powder for more punch.
- Milk: Whole milk gives richness, but almond or cashew milk works in a pinch. For a tangy note, add a splash of sour cream or yogurt if dairy is okay.
- Pasta: Whole wheat or chickpea pasta adds fiber and protein. Keep in mind their firmer texture and adjust cooking time accordingly.
Equipment & Tools
- Large pot: Boil pasta efficiently and quickly.
- Saucepan: Prepare the cheese sauce on the stovetop.
- Baking dish: Bake the assembled mac and cheese to crisp the topping.
- Mixing spoon: Stir ingredients and combine everything smoothly.
- Measuring cups and spoons: Accurately measure liquids and seasonings.
- Toaster or oven: Toast breadcrumbs to golden perfection.
Step-by-step guide to Hell’s Kitchen Mac and Cheese
- Gather your equipment: a large pot for boiling, a saucepan for sauce, a baking dish, and a mixing spoon. Preheat your oven to 190°C (375°F).
- Boil the pasta: Fill the large pot with water, add a generous pinch of salt, and bring to a rolling boil. Cook the pasta until just al dente, about 1 minute less than package instructions. Drain and set aside.
- Make the cheese sauce: In the saucepan, melt butter over medium heat (around 160°C/320°F). Once melted, whisk in flour and cook for 1 minute until bubbling and slightly golden.
- Gradually add milk: Pour in warm milk in a thin stream, whisking constantly to prevent lumps. Bring to a gentle simmer (about 85°C/185°F) and cook until slightly thickened, about 3-4 minutes.
- Add cheese: Lower heat to medium-low (around 140°C/285°F). Stir in shredded cheddar, a handful at a time, letting each addition melt fully before adding more. Season with salt and pepper. The sauce should be smooth, cheesy, and oozy.
- Combine pasta and sauce: Toss the cooked pasta into the cheese sauce, stirring well. Transfer everything to a greased baking dish.
- Top with breadcrumbs: Evenly sprinkle toasted panko breadcrumbs over the top. For extra flavor, mix breadcrumbs with a little melted butter and garlic powder before sprinkling.
- Bake: Place the dish in the oven and bake for 20-25 minutes until bubbling around the edges and the breadcrumbs are golden brown. If you want a crispier top, broil on high for 2-3 minutes, watching closely to prevent burning.
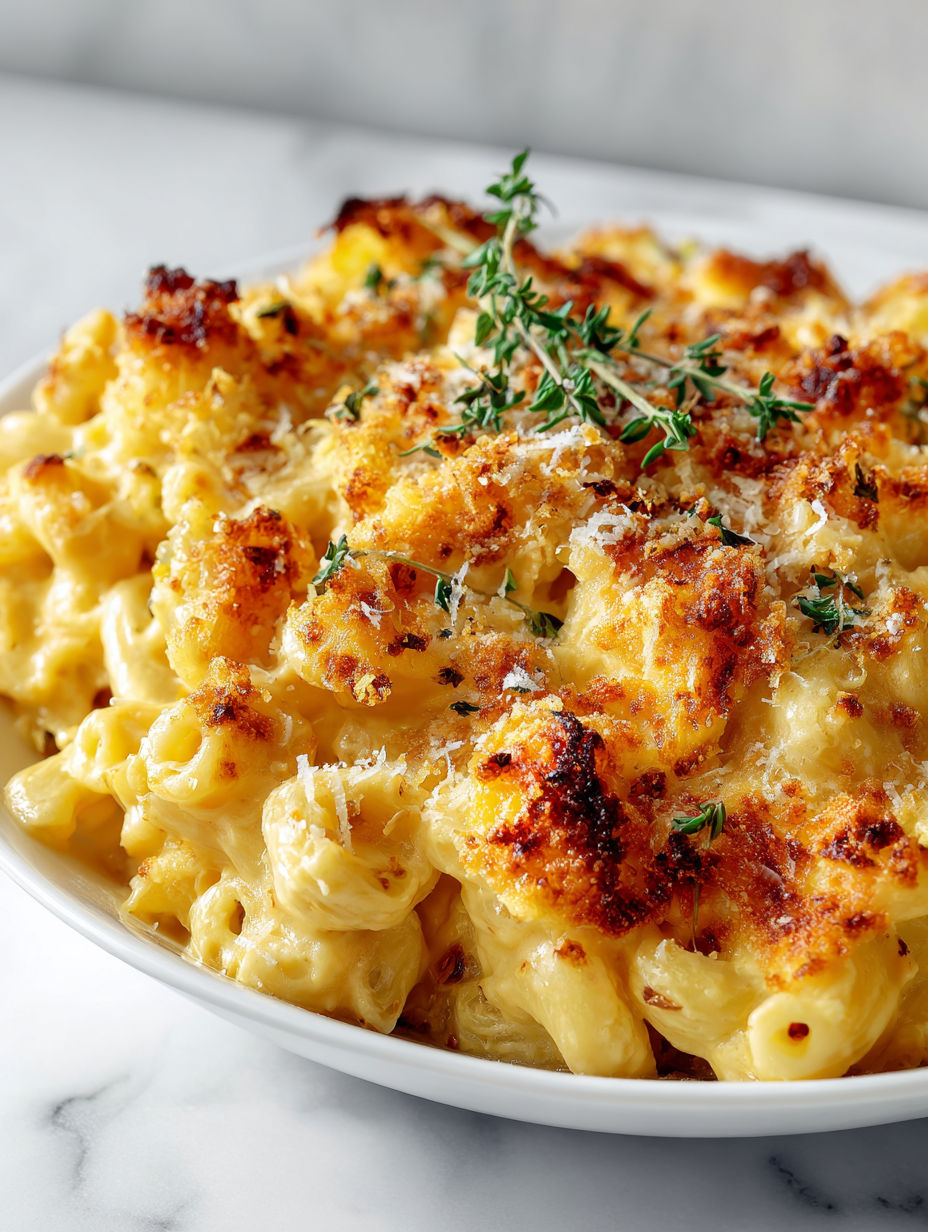
- Finish and serve: Let sit for 5 minutes to set. Serve hot, with a sprinkle of extra cheese or fresh herbs if desired. The top should be crispy, the cheese gooey, and the aroma irresistible.
Let the baked mac and cheese rest for 5 minutes to allow the sauce to set. Serve straight from the dish, ensuring the top is crispy and cheese is gooey. Garnish with a little extra cheese or herbs if you like.
How to Know It’s Done
- Cheese sauce is smooth, glossy, and coats the pasta evenly.
- Breadcrumbs are golden and crispy, not soggy or burnt.
- The dish is bubbling around the edges, indicating it’s hot and cooked through.
Hell’s Kitchen Mac and Cheese
Ingredients
Equipment
Method
- Fill a large pot with water, add a pinch of salt, and bring it to a rolling boil. Add the pasta and cook until just al dente, about 1 minute less than package instructions. Drain and set aside.
- In a saucepan over medium heat, melt the butter until it foams and smells nutty, about 1 minute. Whisk in the flour and cook, stirring constantly, until the mixture bubbles and turns a light golden, about 1 minute.
- Gradually pour in the warm milk, whisking continuously to create a smooth, velvety sauce. Bring to a gentle simmer and cook until slightly thickened, about 3-4 minutes, with a soft bubbling sound.
- Lower the heat to medium-low and stir in the shredded cheddar cheese a handful at a time, waiting for each addition to melt before adding more. Season the sauce with salt and pepper, tasting to balance the flavors. The sauce should be rich, smooth, and cheesy.
- Pour the cheese sauce over the cooked pasta and toss gently until evenly coated. Transfer everything to a greased baking dish, spreading it out into an even layer.
- Toast the panko breadcrumbs in a dry skillet or oven until golden and crispy. Mix the toasted crumbs with a little melted butter for extra flavor, then sprinkle evenly over the top of the pasta.
- Bake in a preheated oven at 375°F (190°C) for 20-25 minutes until bubbling around the edges and the topping is golden brown. For an extra crispy top, broil on high for 2-3 minutes, watching closely.
- Remove from the oven and let sit for 5 minutes to settle. Serve hot, with the crispy breadcrumbs providing a delightful crunch against the gooey cheese.
Tips & Tricks for Perfect Mac & Cheese
- flavor: Use a mix of sharp and mild cheeses to balance creaminess and tang—taste as you go.
- Texture control: Cook pasta just to al dente; overcooked pasta turns mushy after baking.
- Cheese melt: Warm the milk before adding to the cheese; helps achieve a smooth, velvety sauce.
- Breadcrumb crunch: Toast breadcrumbs until golden and crispy; toss with a little butter for extra richness.
- Sauce consistency: If sauce is too thick, whisk in a splash of warm milk to loosen it up.
- Baking timing: Broil the top for 2-3 minutes only—watch carefully to prevent burning and get perfect crunch.
Common Mac and Cheese Mistakes
- FORGOT to preheat oven → Preheat oven early to save time and ensure even baking.
- DUMPED cheese too quickly → Add cheese gradually, stirring gently for smooth melting.
- OVER-TORCHED breadcrumbs → Keep a close eye during broiling; remove once golden, not burnt.
- MISSED stirring sauce → Whisk continuously when adding milk to prevent lumps and separation.
Quick Fixes and Pantry Swaps
- If cheese sauce is grainy → Whisk in warm milk gradually to smooth out texture.
- When breadcrumbs burn → Shield with foil or lower oven temperature slightly.
- Splash cold water on bubbling cheese → Stops boiling and prevents over-thickening.
- Patch over a dry dish → Drizzle a little extra warm milk and stir gently.
- When in doubt, swap crushed crackers → Adds crunch if breadcrumbs aren’t available, smell for toastiness.
Prep, store, and reheat tips
- Prepare the cheese sauce and cook the pasta ahead of time; store separately in airtight containers in the fridge for up to 2 days. The smell of cheese and cooked pasta will be inviting and comforting.
- Assemble the baked mac and cheese a day in advance, but don’t add breadcrumbs until just before baking to keep them crispy. Reheat covered in the oven at 175°C (350°F) for about 20 minutes, until bubbling and hot.
- Store leftovers in an airtight container in the fridge for 3-4 days. The cheesy aroma intensifies, and the dish will firm up, so expect a slightly denser texture upon reheating.
- Reheat in the oven for best results to preserve the crispy topping—avoid the microwave if you want that crunch. Check for bubbling and a warm, cheesy smell. Add a splash of milk if it seems too thick or dry after reheating.
- Freezing is possible: tightly wrap portions and freeze for up to 2 months. Thaw overnight in the fridge, then reheat as above. The dish may lose some of its original creaminess and crunch, but still satisfying.
Top questions about Hell’s Kitchen Mac and Cheese
1. Can I use pre-shredded cheese?
Yes, using pre-shredded cheese can be convenient, but freshly grated cheese melts better and creates a smoother sauce.
2. Can I prepare this dish ahead of time?
Absolutely, you can bake it in advance and reheat. Just add an extra few minutes to ensure it’s heated through.
3. Is it gluten-free friendly?
Yes, you can swap in gluten-free pasta, but it might cook faster and could be a bit firmer or more fragile.
4. My cheese sauce is too thick, what do I do?
If your sauce is too thick, whisk in a little warm milk until it reaches your preferred creaminess.
5. Which cheese varieties work best?
Use sharp cheddar for a punch of flavor, but mix with milder cheeses like mozzarella for a creamier, less intense taste.
6. How do I avoid burning the topping?
To prevent burning, keep an eye during broiling and remove as soon as the breadcrumbs turn golden and crispy.
7. What equipment do I need for cooking?
Use a large, heavy-bottomed pot for boiling pasta to prevent sticking and ensure even cooking.
8. How can I make the topping crispier?
If your breadcrumbs aren’t crispy enough, toast them in a hot pan with a little butter or oil until golden.
9. How do I reheat leftovers?
When reheating leftovers, cover with foil and bake at 175°C (350°F) until hot and bubbly, about 20 minutes.
10. Why is my cheese sauce grainy?
When cheese sauce is grainy, it often means it was overheated or added too quickly; whisk in warm milk to smooth it out.
This dish isn’t just about comfort; it’s about embracing the chaos that makes cooking real and memorable. When I make it, I think of all the imperfect, spontaneous moments in the kitchen that lead to the best flavors. It’s a reminder that sometimes, the messiest dishes turn out to be the most satisfying.
In the end, Hell’s Kitchen Mac and Cheese is a little rebellion on a plate—cheesy, crispy, and full of life. It’s perfect for when you want something hearty without fuss, and a little bit wild. No matter how hectic the day, this dish will always find a way to make things feel a bit more manageable.

Founded by Rachel Morgan, a proud home cook and foodie from Austin, Texas, this blog is all about transforming everyday meals into moments of joy.